Have you ever wanted to welcome beautiful birds right to your backyard? Making a bird box is easier than you think, and it’s a rewarding way to help our feathered friends find a safe home.
Imagine watching birds nest, feed, and sing just outside your window. In this guide, you’ll discover simple steps to create your own bird box, even if you’ve never built anything before. Ready to bring more life and joy to your outdoor space?
Let’s get started!
Choosing The Right Materials
Making a bird box needs careful material choices. Good materials keep birds safe and comfy.
Using the right wood, tools, and finishes helps create a strong and lasting bird home.
Selecting Safe Wood Types
Choose natural wood that is untreated and free from chemicals. Avoid soft woods that may rot fast.
- Cedar: Weather-resistant and long-lasting
- Pine: Affordable but needs sealing
- Redwood: Durable and safe for birds
- Oak: Strong but heavy for some designs
Gathering Necessary Tools
Use tools that help you measure, cut, and join wood cleanly. Keep safety gear ready.
| Tool | Purpose |
| Measuring Tape | Measure wood pieces accurately |
| Hand Saw | Cut wood to size |
| Hammer | Drive nails safely |
| Screwdriver | Attach screws firmly |
| Sandpaper | Smooth rough edges |
Avoiding Harmful Finishes
Birds are sensitive to chemicals. Use finishes that keep them safe and dry without toxins.
- Do not use paint with lead or strong solvents
- Choose natural oils like linseed or tung oil
- Apply finishes only on the outside surfaces
- Let finishes dry completely before use
Designing Your Bird Box
Designing a bird box is key to making a safe home for birds. A good design helps birds feel secure and comfortable.
Think about size, entrance, ventilation, and drainage to build a perfect bird box.
Determining The Size
The size of the bird box depends on the bird species you want to attract. Small birds need smaller boxes, larger birds need bigger ones.
Make sure the box is roomy enough for birds to move inside but not too large to feel unsafe.
- Small birds: 4×4 inches base, 8 inches height
- Medium birds: 6×6 inches base, 10 inches height
- Large birds: 8×8 inches base, 12 inches height
Planning The Entrance Hole
The entrance hole size controls which birds can enter your bird box. It also keeps bigger animals out.
Place the hole high on the front panel to protect birds from predators and weather.
- Small birds: 1 to 1.25 inches diameter
- Medium birds: 1.5 to 2 inches diameter
- Large birds: 2.5 to 3 inches diameter
Considering Ventilation And Drainage
Good ventilation keeps the bird box cool and fresh inside. Drainage stops water from building up and spoiling the nest.
Add small holes near the top and bottom of the box for air flow and water drainage.
- Ventilation holes: two or more near the top
- Drainage holes: several small holes in the floor
- Use untreated wood to avoid harmful chemicals
Building The Bird Box
Building a bird box is a fun project that helps birds find a safe home. You will need some wood, tools, and simple steps to make the box.
This guide shows how to cut the wood, put the pieces together, and add the roof and entrance.
Cutting The Wood Pieces
Start by cutting all the wood pieces you need. Use a saw to make clean and straight cuts. Make sure the pieces fit well together.
- One back piece (about 12 inches by 7 inches)
- One front piece (same size as the back)
- Two side pieces (about 7 inches by 7 inches)
- One bottom piece (about 5 inches by 5 inches)
- One roof piece (about 8 inches by 7 inches)
Assembling The Box
After cutting, join the pieces to form the box shape. Use nails or screws to hold the wood firmly. Check that all sides are square and stable.
- Attach the two side pieces to the back piece
- Fix the bottom piece between the sides
- Secure the front piece to close the box
- Leave the front top open for the entrance
Adding The Roof And Entrance
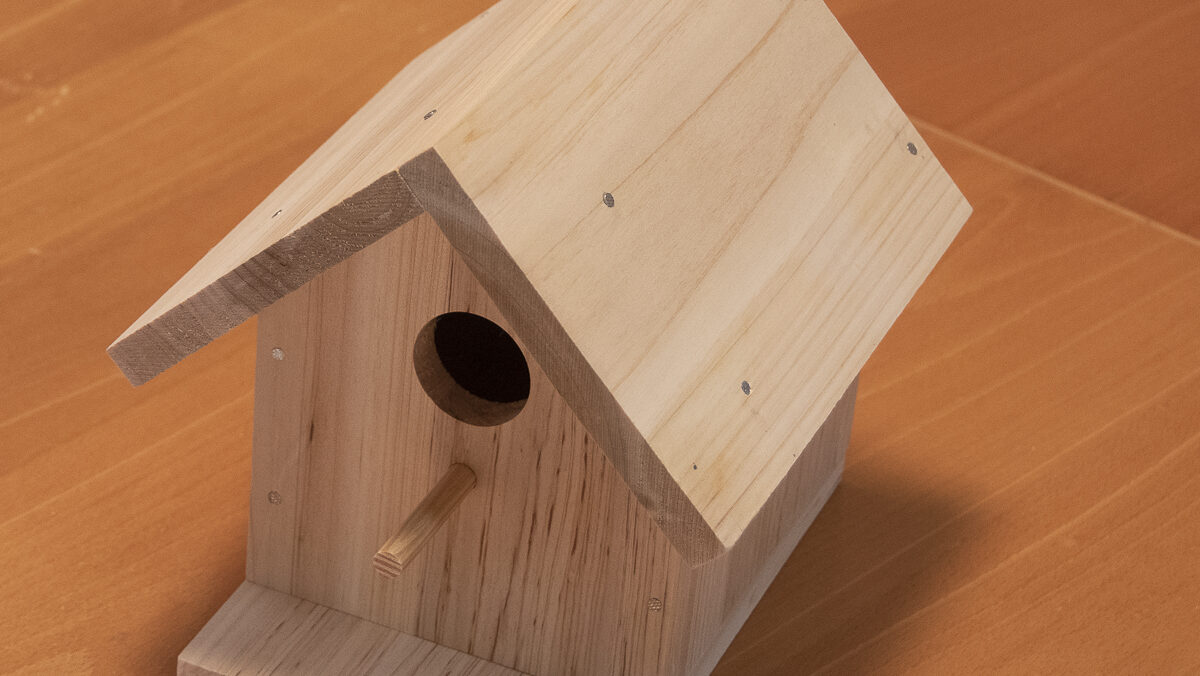
Place the roof piece on top of the box. It should hang over the edges to keep rain out. Attach it firmly but allow easy removal for cleaning.
Cut a small round hole in the front piece for the entrance. The size should fit the bird species you want to attract.
- Roof size: 8 inches by 7 inches, slightly larger than box top
- Entrance hole: 1.5 inches diameter for small birds
- Attach roof with screws for easy opening

Credit: www.youtube.com
Finishing Touches
After building the main structure of the bird box, it is important to focus on the finishing touches. These steps make the bird box safe and durable for birds.
Proper finishing helps protect the wood and ensures the bird box lasts through different weather conditions.
Sanding And Smoothing Edges
Use sandpaper to smooth all the edges and surfaces of the bird box. This prevents birds from getting hurt by sharp wood.
- Start with rough sandpaper to remove splinters.
- Use finer sandpaper to smooth the surfaces.
- Pay special attention to the entrance hole and edges.
- Wipe away dust with a dry cloth after sanding.
Applying Protective Coating
Apply a safe, non-toxic protective coating to guard the bird box against rain and sun.
| Type of Coating | Benefits | Notes |
| Natural Oil (e.g., linseed oil) | Water resistant, safe for birds | Reapply yearly |
| Water-based Exterior Paint | Durable, many colors | Use only outside the entrance hole |
| Clear Wood Sealant | Protects wood without changing look | Choose non-toxic options |
Adding Mounting Features
Secure mounting helps keep the bird box stable and safe from predators and wind.
Here are common mounting options:
- Attach a sturdy metal bracket to the back.
- Use strong screws to fix the box to a tree or pole.
- Install a mounting plate for easy removal and cleaning.
Installing The Bird Box
Installing a bird box is a rewarding task that helps local birds find a safe home. Proper installation makes sure the birds stay safe and comfortable.
This guide covers how to choose the best location, ways to mount the box, and how to protect birds from predators.
Choosing The Best Location
Select a quiet spot with little foot traffic. Birds prefer places away from busy areas and noisy machines.
- Place the box 5 to 10 feet above the ground
- Face the entrance away from prevailing winds
- Choose a spot with some shade during the hottest part of the day
- Avoid areas with dense bushes or thick tree branches nearby
- Keep the box near natural food sources like trees or shrubs
Mounting Techniques
You can mount the bird box on a tree, pole, or wall. Use strong materials and tools to secure it safely.
| Mounting Option | Materials Needed | Tips |
| Tree | Screws, brackets, or straps | Use straps to avoid tree damage |
| Wooden Pole | Screws, nails, or brackets | Make sure pole is firmly in the ground |
| Wall or Fence | Screws, wall plugs | Choose a sheltered spot |
Ensuring Safety From Predators
Protect birds from cats, squirrels, and other predators. Use barriers or design features that keep them out.
- Install a metal predator guard around the pole or tree trunk
- Place the box away from branches that predators can jump from
- Use a small entrance hole to fit only small birds
- Keep the box clean to avoid attracting unwanted animals

Credit: www.youtube.com
Maintaining Your Bird Box
Keeping your bird box in good shape helps birds stay safe and comfortable. Regular care makes sure the box lasts longer.
Check your bird box often to catch problems early. This keeps the birds happy and healthy.
Regular Cleaning Tips
Clean your bird box at least once a year. Remove old nesting material to prevent pests and disease.
Use gloves and a small brush to scrub inside. Avoid harsh chemicals that could harm birds.
- Wear gloves for safety
- Use warm water and mild soap
- Rinse well and let dry before reuse
- Clean in late fall or winter when birds are not nesting
Seasonal Care
Inspect your bird box each season. Check for damage from weather or animals.
Fix loose parts and repaint if needed. Use non-toxic paint to protect the wood.
- Check for cracks or holes
- Clear away leaves or debris
- Make sure the box is secure on its mount
- Provide shade in hot months if possible
Monitoring Bird Activity
Watch for signs of birds using your box. Note the types of birds and their behavior.
Keep a distance to avoid disturbing the birds. Record observations to learn about local bird life.
- Look for nest building or feeding
- Listen for bird calls near the box
- Check for eggs or chicks safely
- Report any problems like predators or pests
Credit: bringbinoculars.com
Frequently Asked Questions
What Materials Are Needed To Make A Bird Box?
You need untreated wood, nails or screws, a saw, drill, and sandpaper. Use non-toxic paint if decorating. Avoid treated wood to keep birds safe.
How Do I Choose The Right Bird Box Size?
Select a size based on the bird species. Small boxes suit wrens or chickadees. Larger boxes work for bluebirds or starlings. Proper size encourages nesting.
Where Should I Place A Bird Box?
Place it 5-10 feet above ground. Mount on a tree or pole away from predators. Ensure it faces away from prevailing winds for shelter.
How Do I Maintain And Clean A Bird Box?
Clean the box after each nesting season. Remove old nesting material and debris. Use gloves and mild soap with water. Regular cleaning prevents parasites and disease.
Conclusion
Building a bird box is simple and rewarding. You provide birds a home. This small project connects you with nature. Tools and materials are easy to find. Follow the steps carefully. Precision ensures a safe haven for birds. Paint or decorate it to match your garden.
Placing it correctly is key. Ensure it’s safe from predators. Soon, you’ll hear chirping and see nesting activity. Enjoy watching the birds visit. Your garden becomes lively and vibrant. Share this experience with family and friends. Encourage them to make bird boxes too.
Together, support local wildlife.