Have you ever wanted to give your feathered friend a cozy spot to rest and play? Building a bird perch stand is easier than you think, and it can make a big difference in your bird’s happiness and health.
Imagine having a custom perch right in your home—one that fits perfectly with your space and your bird’s needs. In this guide, you’ll discover simple steps to create a sturdy, safe, and stylish bird perch stand. By the end, you’ll have all the tools and tips to build something your bird will love.
Ready to get started? Let’s dive in!

Credit: lilblusbirdboutique.com
Materials Needed
Building a bird perch stand requires a few basic materials. Choosing the right supplies ensures your project is safe and sturdy.
Below are the main categories of materials you will need to gather before starting your build.
Wood Selection
Select wood that is strong and safe for birds. Avoid treated wood as it can be harmful.
- Hardwood like oak or maple for durability
- Untreated pine for a lightweight option
- Wood pieces free of splinters and cracks
- Properly dried wood to prevent warping
Tools Required
Use the right tools to cut and assemble your bird perch stand safely and accurately.
| Tool | Purpose |
| Saw | Cut wood pieces to size |
| Drill | Make holes for screws |
| Screwdriver | Fasten screws securely |
| Sandpaper | Smooth rough edges |
| Measuring tape | Measure wood lengths |
Additional Supplies
Besides wood and tools, gather other items to complete your perch stand.
- Non-toxic wood glue for extra hold
- Bird-safe paint or finish to protect wood
- Screws and nails suitable for woodworking
- Rubber feet or pads to prevent slipping

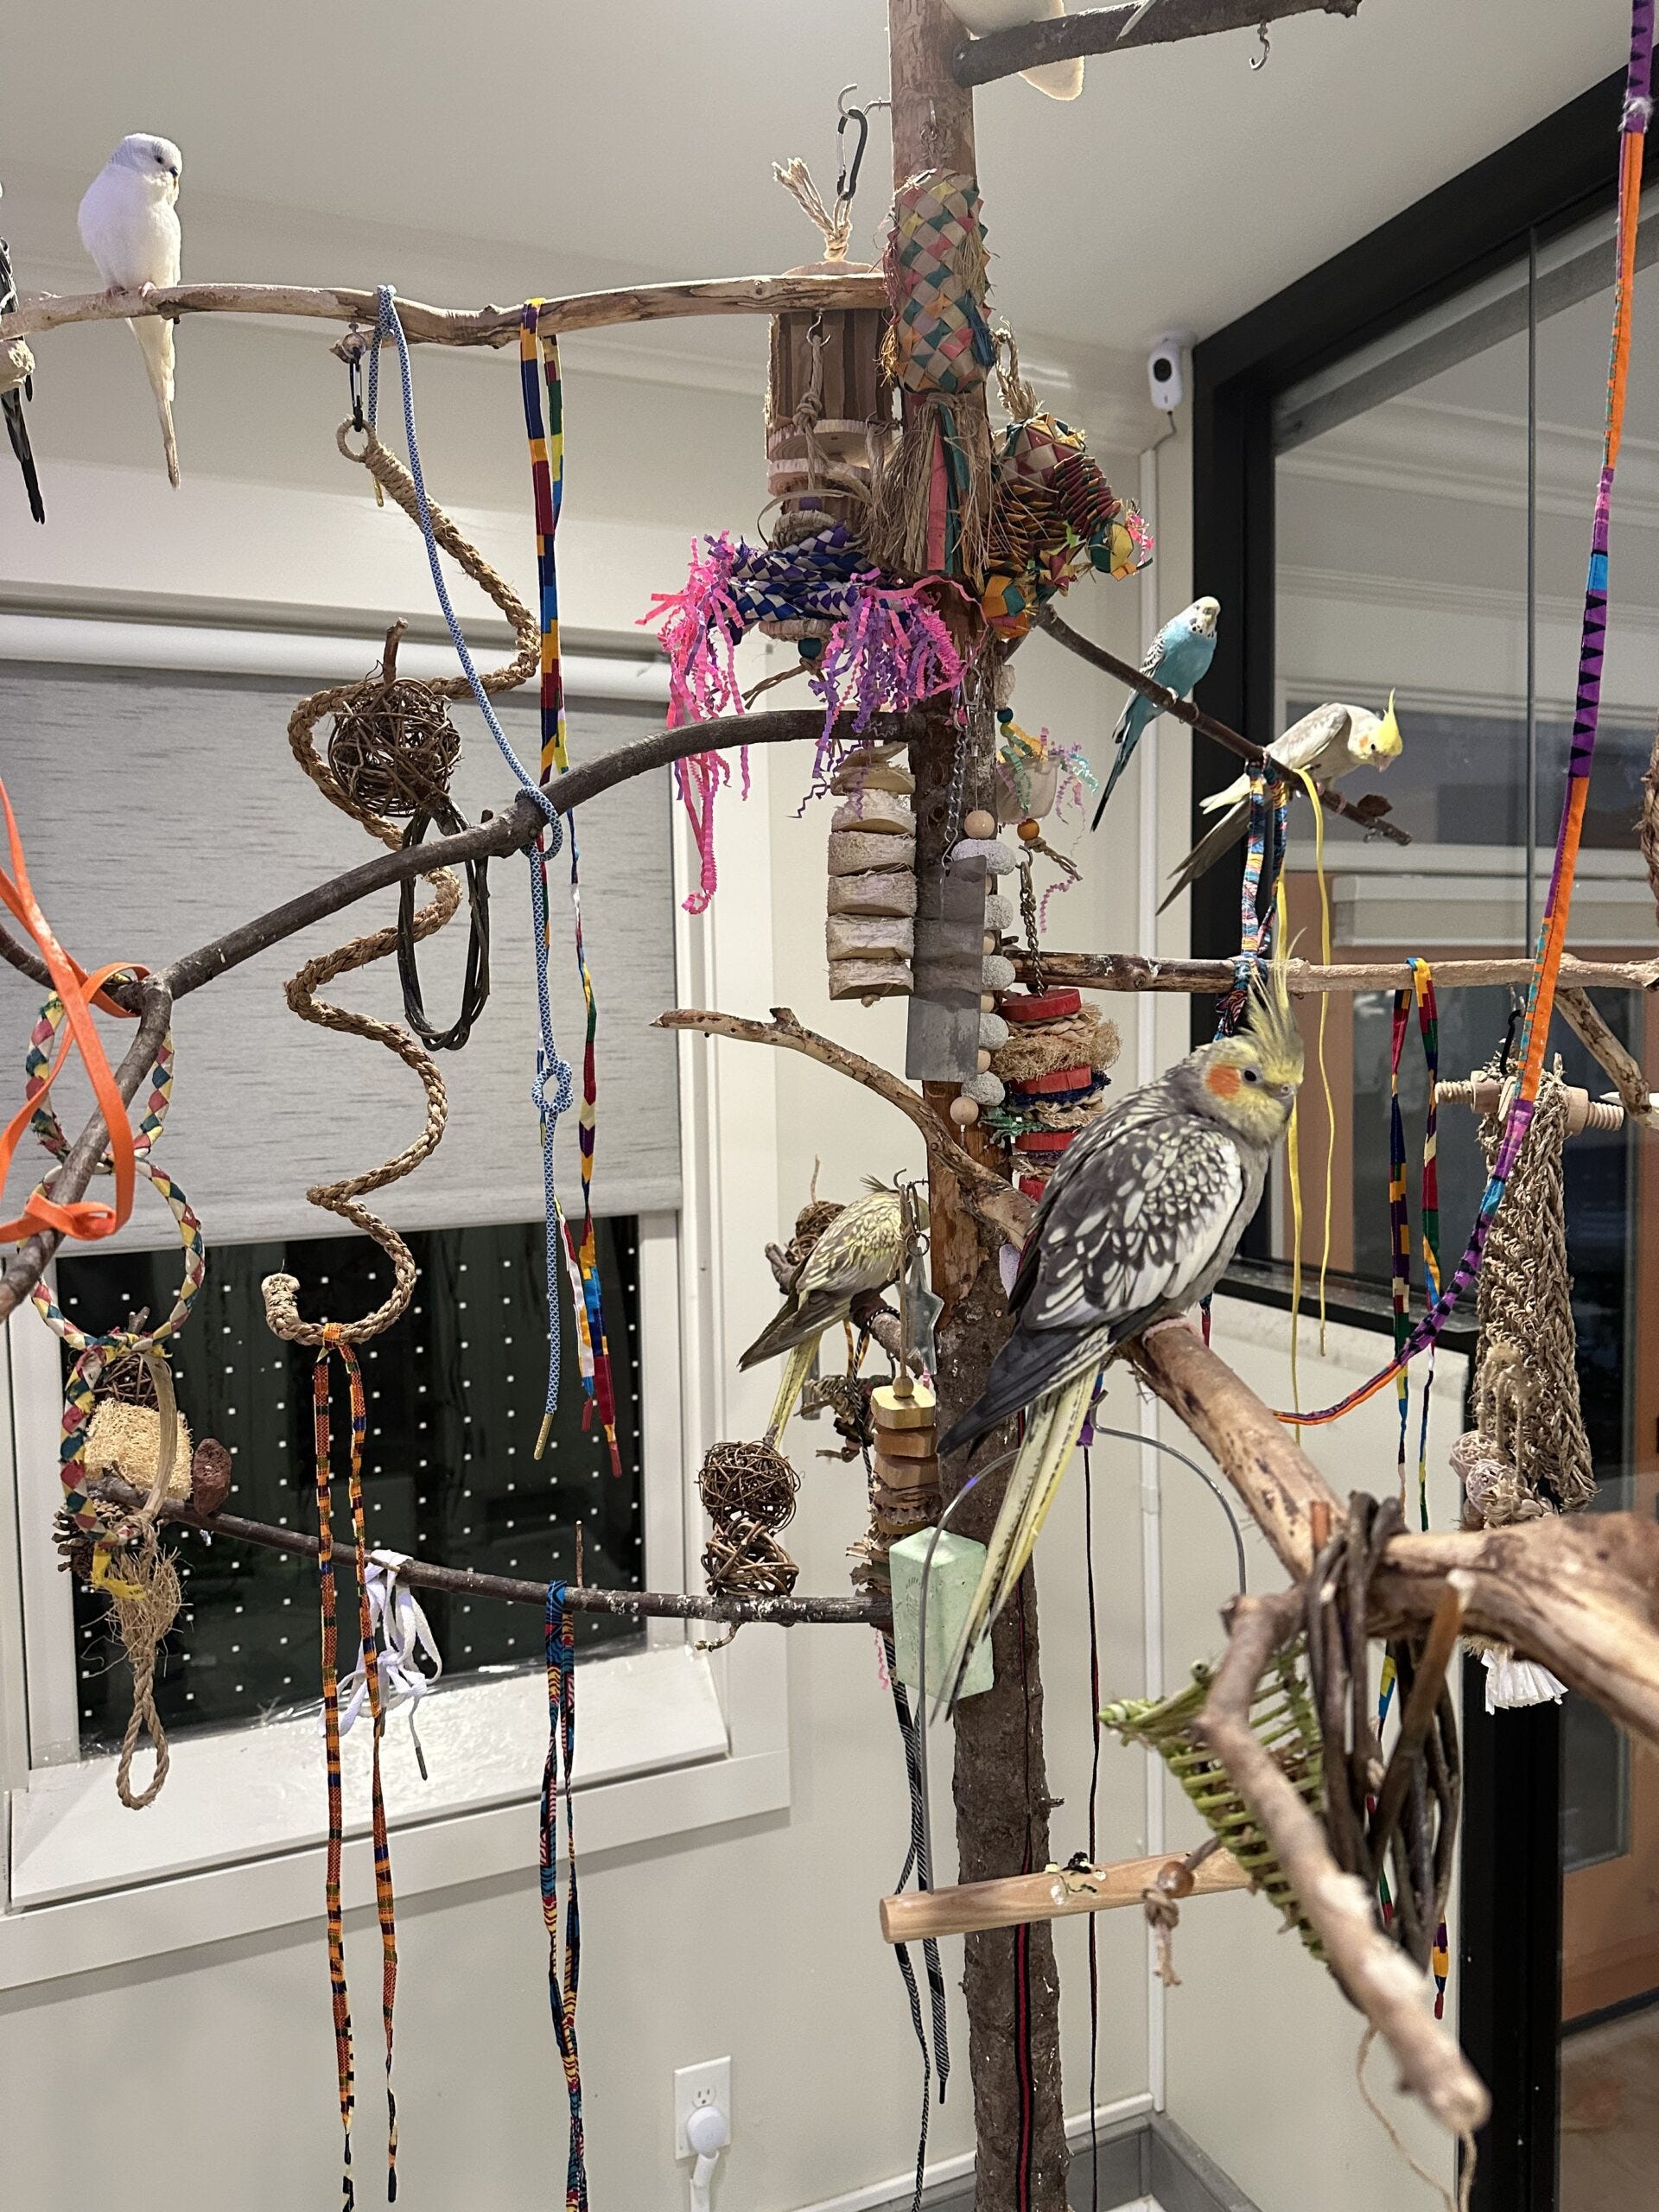
Credit: www.reddit.com
Choosing The Right Location
Finding a good spot for your bird perch stand is important. The right location keeps your bird happy and safe.
Think about where you want to place the stand. It can be inside your home or outside in the yard.
Indoor Vs Outdoor Placement
Indoor placement protects birds from weather and predators. It also helps keep your bird close to family.
Outdoor placement gives birds fresh air and sunlight. But you must watch for dangers like cats and strong winds.
- Indoors: Avoid busy areas to reduce stress.
- Indoors: Place near a window for natural light.
- Outdoors: Choose a shaded spot to avoid direct sun.
- Outdoors: Keep away from places with heavy traffic or loud noises.
Safety Considerations
Safety is key for your bird’s perch stand. Check for hazards around the spot you pick.
| Safety Factor | Indoor | Outdoor |
|---|---|---|
| Sharp Objects | Remove nails, screws, or glass nearby | Clear branches and debris from the area |
| Predators | Watch out for pets like cats or dogs | Protect from wild animals and birds of prey |
| Weather | Keep away from heaters or air conditioners | Provide shelter from rain and wind |
| Stability | Place on a flat, stable surface | Secure the stand to avoid tipping |
Designing Your Perch Stand
Building a bird perch stand requires careful planning. The design must match the bird's needs and safety.
Focus on three main parts: size and height, types of perches, and base stability. Each affects comfort and security.
Size And Height
Choose the size based on your bird's size and activity. Larger birds need wider perches and more space.
The height should allow the bird to feel safe. It should also be easy for you to reach for cleaning and care.
Perch Types
Use different perch materials and shapes. This keeps your bird’s feet healthy and prevents sores.
- Wooden perches: natural and gentle on feet
- Rope perches: soft and flexible
- Concrete perches: help trim nails
- Plastic perches: easy to clean but can be slippery
Base Stability
The base must keep the stand steady. A wobbly base can scare the bird or cause falls.
| Base Type | Pros | Cons |
| Wide wooden base | Strong and steady | Heavy to move |
| Metal base with rubber feet | Non-slip and durable | Can scratch floors |
| Weighted platform | Very stable | Needs extra weight added |
Cutting And Preparing Wood
Building a bird perch stand starts with cutting and preparing the wood correctly. This step makes sure the pieces fit well and are safe for the birds.
Use the right tools and follow careful measuring, cutting, and sanding methods. This guide will help you handle the wood properly.
Measuring And Marking
Measure your wood pieces carefully before cutting. Mark the lines clearly to get precise cuts. Use a ruler and pencil to draw straight lines.
- Measure twice to avoid mistakes
- Mark both sides of the wood
- Use a square tool for right angles
- Label each piece for easy assembly
Cutting Techniques
Cut the wood along the marked lines using the right saw. Keep your hands steady and cut slowly to avoid splinters. Always wear safety gear.
| Tool | Best Use |
| Handsaw | Small, simple cuts |
| Circular saw | Straight, long cuts |
| Jigsaw | Curved or detailed cuts |
Sanding And Smoothing
Sanding smooths the wood surface and removes splinters. This makes the perch safe and nice to touch for the birds.
Follow these tips for good sanding:
- Start with coarse sandpaper (80 grit) to remove rough spots.
- Use medium sandpaper (120 grit) to smooth surfaces.
- Finish with fine sandpaper (220 grit) for a soft touch.
- Sand all edges and corners carefully.
- Wipe off dust with a clean cloth before assembly.
Assembling The Stand
Building a bird perch stand requires careful assembly to ensure it is stable and safe. The process includes joining the pieces, securing the joints, and adding the perches.
Each step helps create a strong structure that birds can enjoy without risk of tipping or breaking.
Joining Pieces
Start by gathering all wood pieces needed for the stand’s frame. Align the legs and support beams carefully before attaching them.
Use wood glue to hold pieces in place temporarily. This makes screwing or nailing easier and more precise.
- Match the ends of the legs with the support beams
- Apply wood glue on the joining surfaces
- Press pieces firmly together for a few minutes
Securing Joints
After the glue sets, secure the joints with screws or nails. This step makes the stand sturdy and safe for birds.
Use a drill or hammer to fix the fasteners. Check that each joint is tight and does not wobble.
- Pre-drill holes to avoid wood splitting
- Insert screws or nails firmly
- Tighten all joints evenly
- Test the stand’s stability by gentle shaking
Adding Perches
Attach the perches at different heights for bird comfort. Use smooth wooden dowels or rods that fit well in the frame.
Secure each perch with screws or nails. Sand the ends to prevent rough spots that can hurt birds.
- Choose perches of suitable thickness
- Place them horizontally between frame parts
- Fix each perch firmly in place
- Sand all surfaces smooth
Finishing Touches
Finishing touches make your bird perch stand safe and attractive. These steps protect the wood and add fun for your bird.
Focus on painting and sealing the wood. Then add toys and accessories to keep your bird happy and active.
Painting And Sealing
Use non-toxic paint safe for birds. Paint helps protect the wood from moisture and dirt.
After painting, apply a clear sealant. This sealant stops paint from chipping and makes cleaning easier.
- Choose water-based, bird-safe paints
- Apply thin coats for even coverage
- Let paint dry fully before sealing
- Use non-toxic, clear sealant for protection
- Allow sealant to cure completely before use
Adding Toys And Accessories
Add toys to keep your bird busy and entertained. Toys also help your bird stay healthy and active.
Include swings, bells, and chew toys. Attach them securely to the stand to avoid accidents.
- Choose bird-safe, durable toys
- Attach toys at different heights
- Check toys regularly for wear
- Replace broken or unsafe toys right away
- Rotate toys to keep your bird interested
Maintaining The Perch Stand
Taking care of your bird perch stand keeps it safe and comfortable. Regular maintenance helps the stand last longer.
Simple cleaning and checks prevent damage and protect your bird's health.
Cleaning Tips
Clean the perch stand often to remove dirt and bird droppings. Use mild soap and warm water for cleaning.
Avoid strong chemicals that can hurt your bird. Rinse well and dry the stand completely before use.
- Use a soft brush to scrub hard spots
- Clean under the perch and base
- Disinfect with bird-safe cleaner weekly
- Let the stand dry in a sunny spot
Checking For Wear
Look over the perch stand for cracks or loose parts. Check wood and screws carefully.
Fix any damage right away to stop accidents. Replace worn parts to keep the perch strong.
- Inspect wood for splinters or cracks
- Make sure screws are tight and not rusty
- Check for wobbling or unstable parts
- Replace damaged pieces promptly
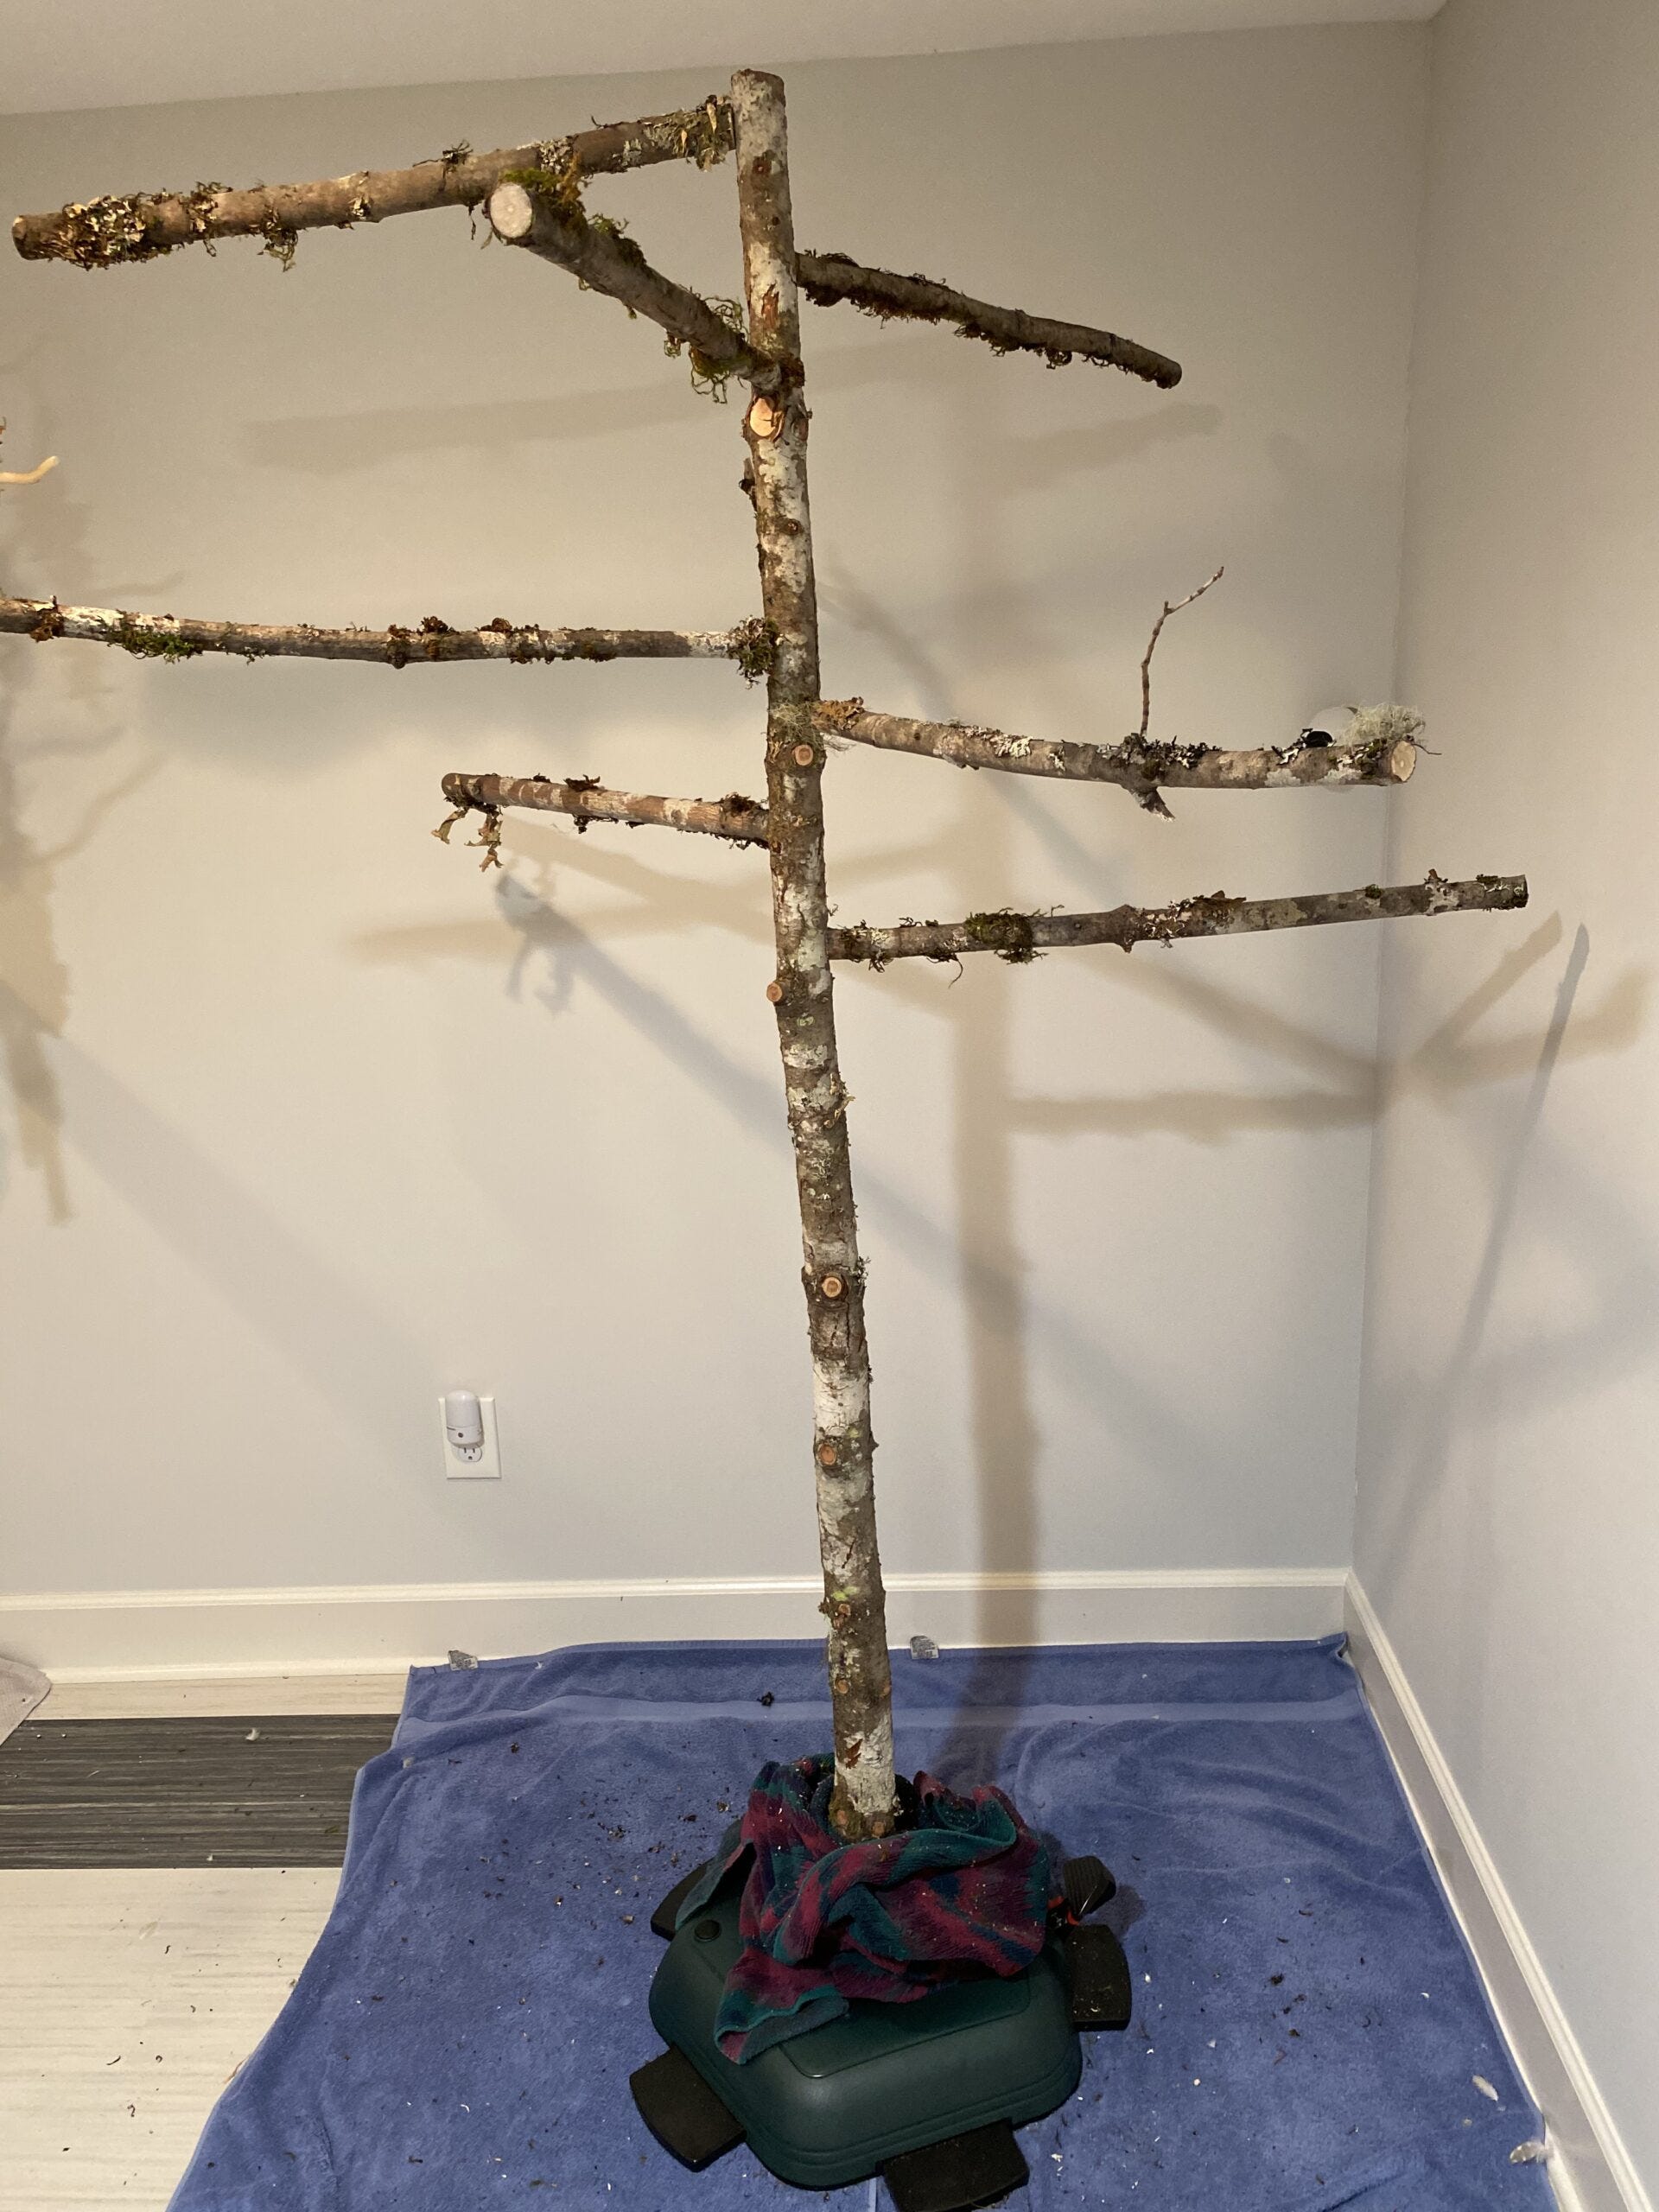
Credit: freerangeparrots.org
Frequently Asked Questions
What Materials Are Needed To Build A Bird Perch Stand?
To build a bird perch stand, you need wood, screws, sandpaper, and paint. Choose safe, non-toxic wood for birds. Use sturdy screws and smooth edges to ensure safety. Optional materials include a base and toys for added bird engagement.
How Do I Ensure The Bird Perch Is Stable?
Ensure stability by using a wide, heavy base to prevent tipping. Secure the vertical post firmly to the base with screws. Check that all joints are tight and the perch is balanced before use. Stability is key for bird safety.
What Size Perch Is Best For Different Birds?
Choose perch diameter based on bird size: small birds need ¾ inch, medium birds 1 inch, and large birds 1. 5 inches. The perch should allow birds to grip comfortably without slipping or straining their feet.
Can I Use Natural Wood For My Bird Perch Stand?
Yes, natural wood is ideal for bird perches. Use untreated, pesticide-free wood like manzanita or maple. Avoid toxic woods such as cedar and pine. Natural wood provides a safe, comfortable surface for birds to grip and chew.
Conclusion
Building a bird perch stand is a rewarding task. It provides your feathered friends with a perfect spot to rest. Start with simple materials and basic tools. Follow each step carefully for a sturdy structure. Your birds will enjoy their new perch.
You'll appreciate the joy it brings to your home. Remember, a well-constructed perch promotes your bird's happiness. And your satisfaction in crafting it is priceless. Enjoy watching your birds perch and play. Your new skill benefits both you and your feathered companions.
Happy crafting!