How to Draw a Bird Perched on a Branch
Materials Needed: Gather a few basic supplies before you begin. Use a range of graphite pencils – hard pencils (H, 2H) for fine light lines and soft pencils (4B, 6B) for deep shading. Keep your pencils well-sharpened so the tip deposits graphite into the paper’s texture. Select a smooth, heavyweight sketch paper or Bristol board; its resilience lets you layer graphite and erase cleanly. Have both a kneaded eraser (for lifting light areas and highlights) and a rubber eraser (for erasing mistakes) on hand. A pencil sharpener and a smudge stump (optional) can also help refine details.

Credit: www.youtube.com
Basic Shapes and Layout
Start with a posture line – a simple angled line to show the bird’s stance. Draw a large oval for the body and a smaller circle for the head along this line. Keep the shapes light so you can adjust easily.
Add the beak and tail next. Sketch a small triangle for the beak and light lines or a rough fan shape for the tail feathers.
Use these basic shapes as a framework. Once proportions look right, reinforce the outline with darker lines. Focus on overall balance first, not details.
-
Posture line and body: Lightly draw a straight or curved axis line for the bird’s stance. Sketch a large oval (body) and circle (head) on this line.
-
Beak and tail: Add a small triangle for the beak extending from the head, and lines or a rough fan shape for the tail feathers.
-
Initial outlines: Use these basic shapes as a loose framework. Once you’re satisfied with proportions, reinforce the outline with stronger lines. Don’t worry about details yet – focus on overall balance

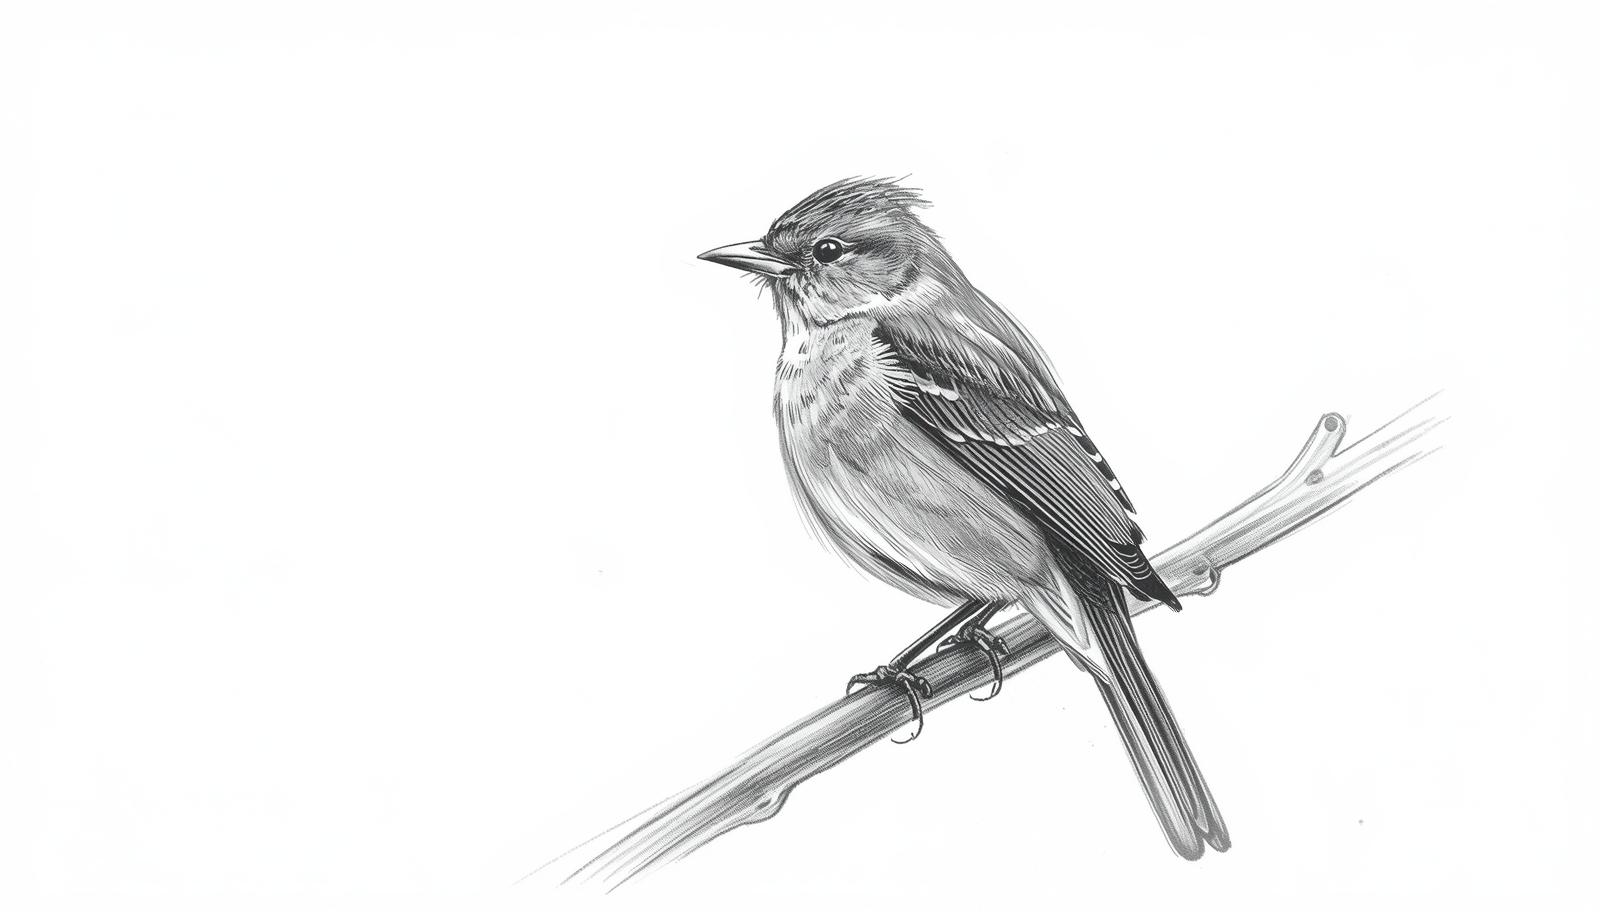
Credit: www.youtube.com
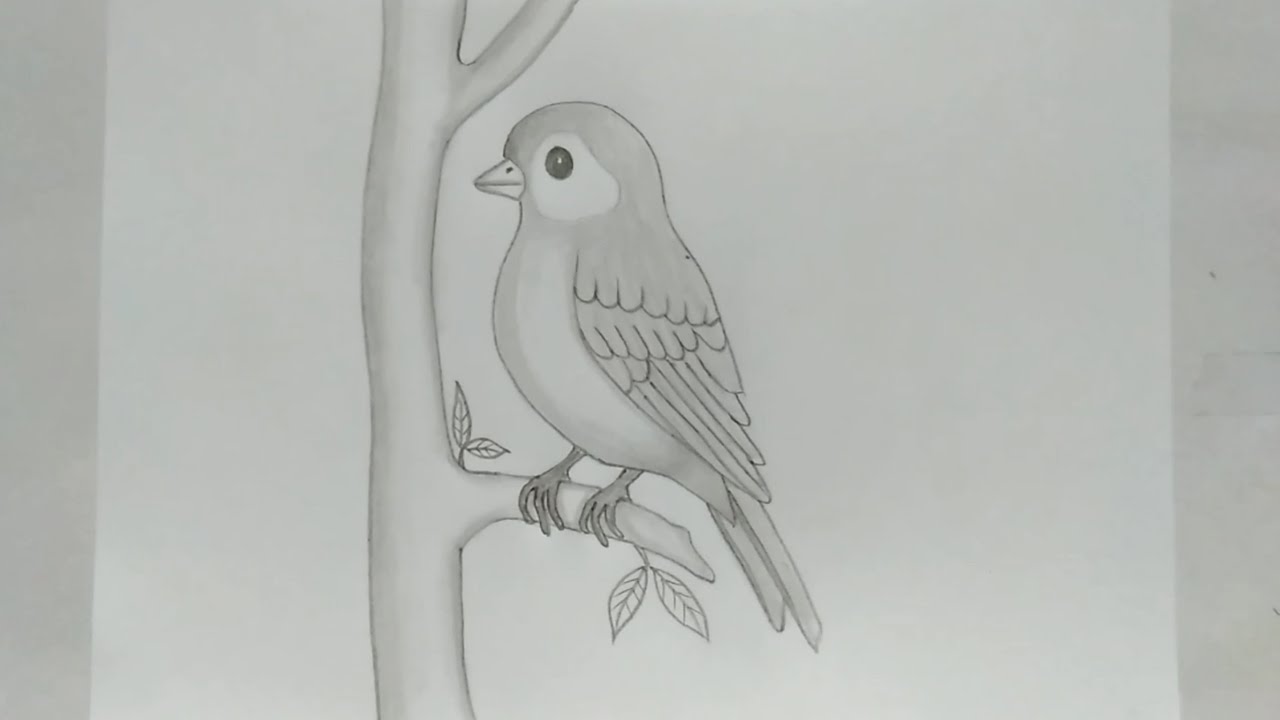
Sketching the Branch
Under the bird, draw a slightly curved branch to perch on. Use a wiggly line for the main branch and thinner offshoots for twigs. Keep these lines light and irregular to suggest the bark’s roughness. You can adjust the branch’s angle and thickness so it naturally supports the bird’s pose.
Adding Bird Features
With the foundation in place, refine the bird’s anatomy:
-
Head and Beak: Shape the head circle into a smooth, slightly pointed form. Draw the beak as a small curved triangle or wedge connecting to the head. Place the eye as a small circle on the head; for realism, position it just below the line of the crown so the bird looks forward. According to Sibley, you can use a guide line for the angle of the bill and eye.
-
Neck and Body: If the bird has a visible neck, gently connect head and body with slightly curved lines (many birds have graceful, S-shaped necks). For a compact body bird, these lines may merge quickly into the body oval.
-
Wings: Sketch the wing by drawing a layered shape along the body’s side. Wings consist of overlapping feathers: outline a smooth curved top edge and indicate long primary feathers beneath. Use smooth, flowing lines with no sharp angles when shaping the wing. Think of the wing as a tapered oval attached to the body, then subdivide it into feather sections.
-
Tail: Extend a set of long feathers from the body’s rear in a fan shape. Each tail feather can be drawn as a narrow triangle. The tail should spread outward, balancing the body; the number of feathers and their length will vary by species (e.g. a songbird has a small fanned tail).
After sketching these parts, you should see a recognizable bird form perched on the branch. All lines so far remain light; at this stage you can erase and adjust freely.
Feather Texture and Pattern
To make the bird look lifelike, draw its feathers with attention to layering and pattern. Feathers generally radiate out from specific body points. For example, head and neck feathers are small and lie flat (the bird’s head often looks smooth), body feathers are medium-sized and softer, and wing/tail feathers are long and stiff. As Sibley explains, feathers “grow toward the tail and press against each other to form a sleek shell”. On the head, use short, gentle strokes to suggest fine plumage. On the body and wings, draw slightly longer, overlapping feather shapes; pay attention to the flow of feathers from the wing’s base to its tip.
-
Observe feather groups: Sketch the arrangement: little feathers radiate from around the eye and bill, larger ones along the flanks, and very long feathers on the folded wing and splayed tail.
-
Stroke direction: Draw pencil strokes following each feather’s orientation. For instance, tail feathers are nearly vertical lines from the tail base; wing primaries arch outward. Vary the stroke length slightly to avoid monotony, mimicking each feather’s taper.
-
Shading feathers: Build value gradually. Use short, controlled strokes to create smooth shading. Beginners often sweep with long strokes, but moving the pencil only a millimeter or two at a time yields an even tone. Darken the areas where feathers overlap or recede (such as under the wing and along the body’s underside), and leave lighter strokes on the top-facing edges. This contrast adds depth. If tiny white gaps appear in your shading, go over them with a very sharp, hard pencil (H or 2H). Use a kneaded eraser shaped to a point to lift stray black dots or soften highlights.
Gradually increase pressure on softer pencils (4B–6B) to deepen shadows in the plumage. Remember that the only very “fluffy” part of a bird is usually the belly between the legs; most of the body is a smooth shell of feathers.
Refining the Branch and Leaves
Enhance the branch by adding bark texture. Use short, jagged pencil strokes along the branch to mimic rough bark lines and small cracks. Shade one side of the branch darker to suggest roundness, as if light falls from the opposite side. You can add a few simple leaves near the branch’s ends: sketch thin ovals or teardrop shapes, and add central veins or gentle shading if desired. Keep leaf details minimal so they don’t distract from the bird.
Shading and Depth
Decide on a light source (for example, light coming from the top left). Shade the bird and branch consistently with that lighting. The bird’s cast shadow on the branch should be darkest where the bird touches the branch and gradually lighten outward. Apply gradual shading transitions: avoid harsh boundaries between light and dark. A smooth gradient helps the roundness of the bird’s form. For instance, shade the side of the body opposite the light a bit darker, and feather tips that catch light should be left lighter.
Use your soft pencils (4B–6B) to create rich dark areas (inside the eye, under the wing, or on the shaded side of the body) and your harder pencils (H–2H) for subtle light areas and blends. Blend lightly with a stump or by layering strokes to smooth out value changes. Avoid smudging with your fingers; instead, use light pressure and let the paper hold the graphite for a clean look. Remember to preserve bright highlights: if a spot should be very light (such as a glint in the eye or the bird’s forehead), erase gently with a kneaded eraser to bring back white of the paper.
Final Touches
Once all shading and details are done, step back and view your drawing at a normal distance. Erase any unnecessary guidelines to keep it clean.
Strengthen the most important edges, like the bird’s back or the front claw on the branch, so the sketch reads clearly. Darken the beak tip, eye, and branch shadows to add contrast. Lighten areas that catch light with a soft eraser to make them pop.
Take your time. Work slowly and patiently. As Sadie Valeri suggests, focus on small areas fully before moving on – polishing one section sets a high standard for the rest of your drawing.
Credit: www.youtube.com
Frequently Asked Questions
How do I start drawing a bird on a branch?
Begin with basic shapes: draw a guiding line for the bird’s posture, then add an oval for the body and a circle for the head. Sketch the beak and tail direction next. These light construction lines let you check proportions early – John Muir Laws emphasizes double-checking proportions now, because “at that point there’s nothing that you can really do to fix” them later.
What materials are best?
A set of graphite pencils of varying hardness (e.g. 2H through 6B) is ideal. Use smooth, thick drawing paper so it can handle heavy shading and erasing. Keep a kneaded eraser to subtly lift graphite and create highlights, and a vinyl eraser for clean removal of unwanted lines. Always keep your pencils sharp.
How can I make the bird look realistic?
Focus on feather details and correct lighting. Observe how feathers overlap (small on the head, longer on body and wings), and draw them with short strokes following their direction. Shade gradually: build up darks and lights slowly to give volume. Also study real birds or photos – drawing from life trains you to notice wing angles, markings, and form. As Sibley notes, “each drawing is a demonstration of what you know about a bird”.
What mistakes should I avoid?
Don’t rush the outline. Always start light and check proportion before detailing. Avoid stiff, cartoonish poses by observing how a bird naturally perches. Don’t ignore the branch or background – adding even simple textures makes the scene believable. Be careful not to smudge unintentionally; if a value needs lightening, lift it with a kneaded eraser instead of rubbing harshly.
Conclusion
By breaking the drawing into stages and using references, anyone can sketch a convincing bird on a branch. Remember to practice regularly and be patient. As David Sibley advises, each sketch reveals what you know and what you still need to learn about birds. Over time, your proportions, feather details, and shading will improve. Most importantly, enjoy the process of observing and drawing – it deepens your connection with nature as well as your artistic skill. Happy sketching!