If you want to give your feathered friends a cozy spot to rest, making a bird perch out of wood is a perfect choice. It’s simple, affordable, and allows you to create something safe and comfortable for your birds.
Imagine watching your birds happily settle on a perch you crafted yourself—there’s a special satisfaction in that. In this guide, you’ll discover easy steps and helpful tips to build a sturdy, attractive wooden bird perch that suits your needs. Ready to get started and make your birds feel right at home?
Keep reading to learn how!
Choosing The Right Wood
Making a bird perch from wood is a fun and useful project. Picking the right wood keeps birds safe and happy.
Not all wood is good for birds. Some woods can hurt them. Let’s look at which wood to use and which to avoid.
Safe Wood Types
Choose wood that is natural and free of chemicals. Birds like smooth wood without sharp edges or splinters.
- Apple wood
- Maple wood
- Birch wood
- Poplar wood
- Manzanita wood
These woods are safe and sturdy. They do not release harmful oils or dust.
Avoiding Toxic Materials
Some woods contain toxins that can hurt birds. Avoid woods like cedar, pine, and walnut.
- Cedar wood
- Pine wood
- Walnut wood
- Cherry wood (if treated)
- Any wood with paint or chemicals
Also, do not use treated or painted wood. The chemicals can make birds sick.
Wood Size And Shape
Pick a wood size that fits your bird’s feet. The perch should be wide enough to hold their weight.
- Diameter between ¾ inch and 1 inch suits most small birds
- Round or slightly oval shapes are best
- Keep the wood smooth to avoid splinters
- Length depends on cage size and bird activity
A well-sized perch helps birds grip and stay comfortable. Avoid very thin or very thick wood.

Credit: www.reddit.com
Gathering Tools And Materials
Making a bird perch out of wood needs the right tools and materials. You will work with wood and small parts. Being ready helps you finish the project smoothly.
Below are the important items you should gather before starting. These include tools, extra supplies, and safety gear.
Essential Tools
You need some basic woodworking tools to shape and join the wood. These tools help you cut, smooth, and assemble the perch parts.
- Saw – to cut wood pieces
- Sandpaper or sanding block – to smooth edges
- Drill – to make holes for screws
- Screwdriver – to tighten screws
- Measuring tape or ruler – to measure wood lengths
- Pencil – to mark cutting lines
Additional Supplies
Besides tools, you will need wood and other materials. These supplies help build a sturdy perch for your bird.
| Material | Purpose |
| Wooden dowel or branch | Perch for the bird to sit on |
| Wood planks or blocks | Base and support parts |
| Wood screws | To hold parts together |
| Wood glue (optional) | Extra hold for joints |
| Non-toxic paint or finish | Protect wood and safe for birds |
Safety Equipment
Working with wood requires protection. Use safety gear to avoid injuries while cutting or sanding.
- Safety goggles – protect eyes from dust and wood chips
- Dust mask – avoid breathing sawdust
- Work gloves – protect hands from splinters
- Ear protection (if using loud power tools)
Cutting And Preparing Wood
Making a bird perch from wood starts with cutting and preparing the material carefully. Good preparation helps the perch last longer and stay safe for birds.
This guide covers measuring and marking, cutting techniques, and sanding for smoothness. Follow each step to create a clean and sturdy perch.
Measuring And Marking
Start by measuring the wood to the size you want for the bird perch. Use a tape measure or ruler for exact lengths.
- Mark the wood with a pencil where you will cut.
- Double-check measurements before cutting.
- Use a square tool to keep lines straight and even.
Cutting Techniques
Choose the right saw for the wood type and thickness. A handsaw works well for small pieces, while a power saw helps with larger cuts.
| Tool | Best Use | Safety Tip |
| Handsaw | Small cuts on soft wood | Keep hands away from blade |
| Jigsaw | Curved or angled cuts | Use steady pressure |
| Circular Saw | Straight, long cuts | Wear eye protection |
Sanding For Smoothness
Sanding removes rough edges and splinters. It makes the perch safe for birds to hold onto.
- Start with coarse sandpaper to smooth rough areas.
- Use finer sandpaper for a soft finish.
- Sand all sides evenly, including ends and edges.
- Wipe off dust with a clean cloth after sanding.

Credit: www.reddit.com
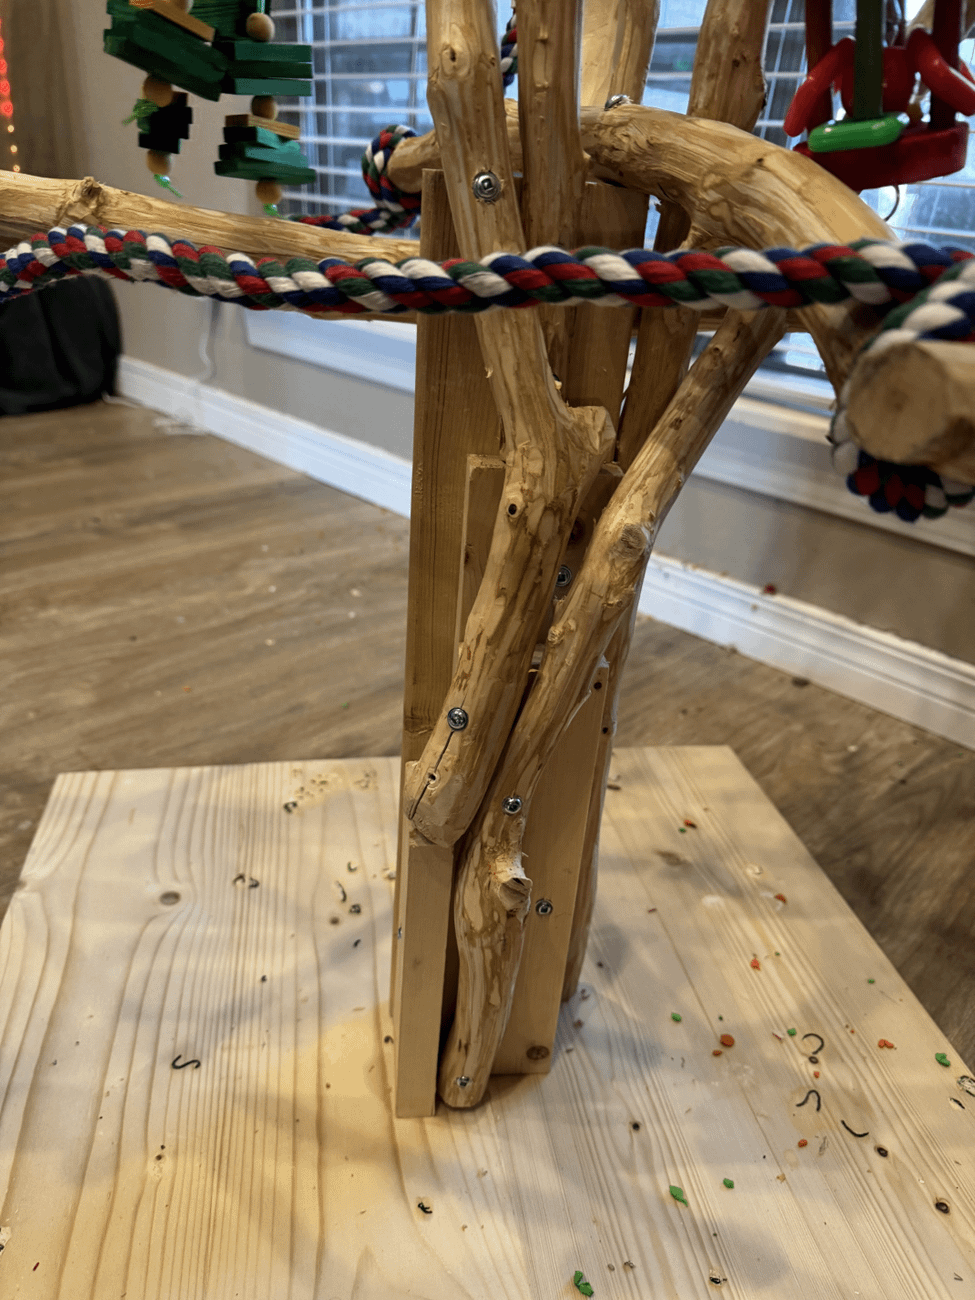
Assembling The Perch
Putting together a bird perch made of wood needs care and the right tools. You must join the parts securely and make sure the perch stays strong.
This guide covers how to join the wood, secure the parts, and keep the perch stable for your bird’s safety.
Joining Methods
Use simple joining methods to connect wooden pieces. Common ways include nails, screws, and wood glue. Each method works best for certain parts.
- Nails: quick and easy but not very strong alone.
- Screws: provide a tighter hold and can be removed if needed.
- Wood glue: bonds pieces firmly when clamped and dried.
- Dowels: wooden pins that fit into drilled holes for extra strength.
Securing Components
After joining, secure the parts so they do not move. Tighten screws well and add glue where parts meet. Use clamps to hold pieces while glue dries.
| Component | Recommended Fastener | Extra Tip |
|---|---|---|
| Perch Rod | Screws + Wood Glue | Clamp tightly for 30 minutes |
| Base Plate | Nails + Glue | Use wide base for balance |
| Support Arms | Dowels + Screws | Drill pilot holes first |
Ensuring Stability
Check the perch after assembly. Place it on a flat surface to test balance. Add extra supports if it wobbles or feels loose.
- Use wider wood for the base.
- Add rubber pads under the base to prevent slipping.
- Double-check all joints for tightness.
- Let glue dry fully before use.
Finishing Touches
Adding finishing touches to your wooden bird perch helps protect it and make it look nice. These steps keep the perch safe for birds and lasting longer.
We will cover non-toxic sealants, decorative options, and tips to maintain your bird perch.
Non-toxic Sealants
Use non-toxic sealants to protect the wood from moisture and wear. These safe finishes keep birds healthy and prevent wood damage.
- Look for water-based polyurethane or natural oils
- Avoid sealants with harmful chemicals or strong smells
- Apply two thin coats and let dry fully between coats
- Test a small area first to ensure safety
Decorative Options
You can decorate the perch to make it more attractive. Choose bird-safe materials and colors that do not harm the wood.
| Decoration Type | Details | Safety Notes |
|---|---|---|
| Natural Wood Carving | Add simple shapes or patterns | No chemicals; safe for birds |
| Bird-safe Paint | Use water-based, non-toxic paint | Ensure paint is dry before use |
| Wrapped Natural Twine | Wrap perch with jute or cotton twine | Replace if frayed to avoid hazards |
Maintenance Tips
Keep the bird perch clean and in good shape. Regular care will extend its life and keep birds safe.
- Clean the perch weekly with mild soap and water
- Check for cracks or splinters and sand them smooth
- Reapply sealant every few months as needed
- Replace decorations if they wear out or become unsafe

Credit: www.reddit.com
Placement And Usage
Making a bird perch from wood is simple and fun. Proper placement helps birds feel safe and comfortable. Using the perch correctly attracts more birds to visit.
This guide explains where to place your wooden bird perch and how to use it well. You will learn about ideal spots, safety tips, and ways to invite birds.
Ideal Locations
Choose a quiet place away from busy areas. Birds like spots with some cover but clear views. Trees, near bushes, or close to bird feeders work well.
- Place the perch 5 to 6 feet above ground
- Keep it near food and water sources
- Choose spots with shade in hot weather
- Avoid locations near predators or pets
- Make sure it is easy to clean and maintain
Safety Considerations
Safety is key for birds to use the perch often. Check for sharp edges and splinters on the wood. Keep the perch sturdy and stable to avoid falls.
| Safety Tip | Reason |
| Smooth all wood surfaces | Prevents injuries to birds |
| Secure the perch firmly | Stops wobbling and accidents |
| Place away from windows | Reduces bird collisions |
| Use non-toxic paint or sealant | Keeps birds safe from chemicals |
Encouraging Bird Use
Make your perch inviting by adding small touches. Birds like places with some shelter and easy access. Offer food and water nearby to attract them.
- Place a small birdbath near the perch
- Scatter birdseed or nuts around the area
- Put up a few leafy branches for cover
- Keep the area quiet and free of pets
Frequently Asked Questions
What Type Of Wood Is Best For Bird Perches?
Hardwoods like oak, maple, and birch are best. They are durable, safe, and resist bird chewing. Avoid treated or toxic wood to keep birds healthy.
How Do I Safely Attach The Perch To A Cage?
Use non-toxic glue or stainless steel screws. Avoid sharp edges and ensure the perch is stable. Always check for secure attachment before placing birds on it.
What Size Should A Bird Perch Be?
Choose perch diameter based on bird size. Small birds need ¾ inch, larger birds require 1 to 1½ inches. Proper size helps birds grip comfortably and prevents foot problems.
How Can I Clean A Wooden Bird Perch?
Clean with mild soap and warm water. Avoid harsh chemicals. Rinse thoroughly and let it dry completely before use to keep birds safe and healthy.
Conclusion
Creating a bird perch is rewarding. A simple project with natural materials. Birds will love the new perch. You can observe them up close. No need for expensive tools. Just basic woodworking skills. Enjoy the satisfaction of DIY. Encourage friends to try it too.
Share your experience and tips. A great way to connect with nature. Plus, it enhances your backyard. Birds add beauty and life. Keep experimenting with designs. Each perch can be unique. Remember, patience and practice help. You’ll become more skilled over time.
Happy birdwatching!