Bird Photography at Feeders: Capture Stunning Backyard Bird Photos
If you love watching birds at your feeder, imagine capturing their beauty through your camera lens. Bird photography at feeders allows you to photograph birds up close without disturbing them, all from the comfort of your home.
You don’t need expensive equipment or professional skills to get started. With patience, proper setup, and the right techniques, backyard bird photography can produce sharp, colorful, and meaningful images. In this guide, you’ll learn how to improve photographing birds at feeders, from choosing the best feeder to camera settings and ethical practices.
Let’s turn your backyard into a bird photography studio.

Credit: avibirds.com
Why Bird Photography at Feeders Works So Well
Bird photography at feeders works because feeders bring birds to predictable locations. This allows photographers to plan shots, adjust lighting, and experiment with composition.
Feeders also attract a wide variety of species, making feeder bird photography tips especially useful for beginners and experienced photographers alike.
Choosing The Right Feeder
Bird feeders are great for watching birds up close. Picking the right feeder helps attract different birds.
Feeders come in many shapes and sizes. Each type works best for certain birds and seeds.
Types Of Bird Feeders
There are many bird feeders to choose from. Each type suits different bird species and seeds.
- Tube feeders:Long tubes with small feeding ports. Good for small birds like finches.
- Hopper feeders:Box-shaped feeders that hold lots of seed. Attracts many bird types.
- Platform feeders:Flat trays that hold seed and fruit. Open to many bird species.
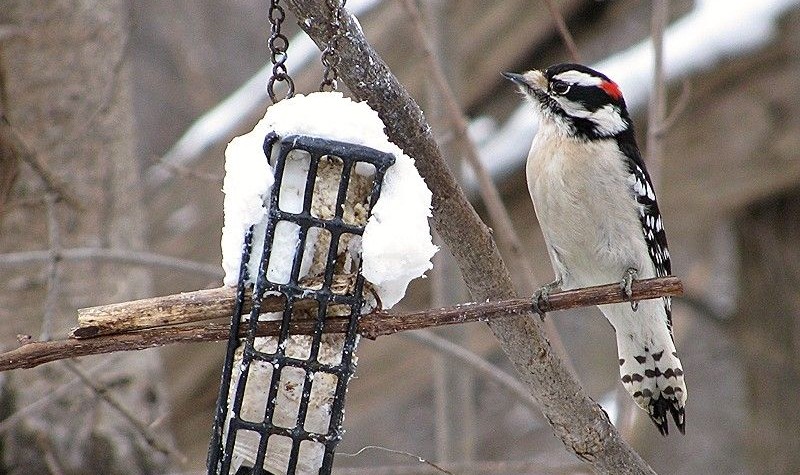
- Suet feeders:Wire cages for suet cakes. Best for woodpeckers and nuthatches.
- Nectar feeders:Designed for hummingbirds. Hold sugar water to attract them.
Best Locations For Feeders
Placing feeders in the right spot helps birds feel safe. It also makes bird watching easier for you.
Choose spots with some cover nearby. Trees or shrubs let birds hide from predators.
- Place feeders near windows for easy viewing.
- Keep feeders away from busy walkways.
- Mount feeders 5 to 6 feet above the ground.
- Avoid areas with strong wind or direct sun all day.
Attracting Different Bird Species
Different birds like different seeds and feeders. Use the right mix to attract many species.
Offer a variety of seeds and feeder types. This invites more birds to visit your feeders.
- Finches:Prefer thistle or nyjer seed in tube feeders.
- Sparrows and cardinals:Like sunflower seeds in hopper or platform feeders.
- Woodpeckers:Enjoy suet cakes in suet feeders.
- Hummingbirds:Visit nectar feeders with fresh sugar water.
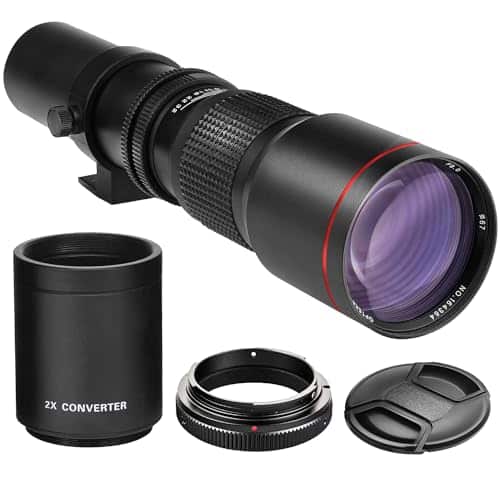
Camera Gear Essentials
Bird photography at feeders needs the right camera gear. Good gear helps capture sharp and clear photos.
Choosing the right tools makes it easier to get close-up shots of birds feeding.
Recommended Cameras And Lenses
A camera with fast autofocus and good zoom helps in bird photography. DSLR and mirrorless cameras work well.
Long lenses let you take photos without scaring the birds. A lens of 300mm or more is ideal.
- DSLR or mirrorless cameras with fast autofocus
- Telephoto lenses from 300mm to 600mm
- Zoom lenses for flexibility
- Wide aperture (f/4 or lower) for better light
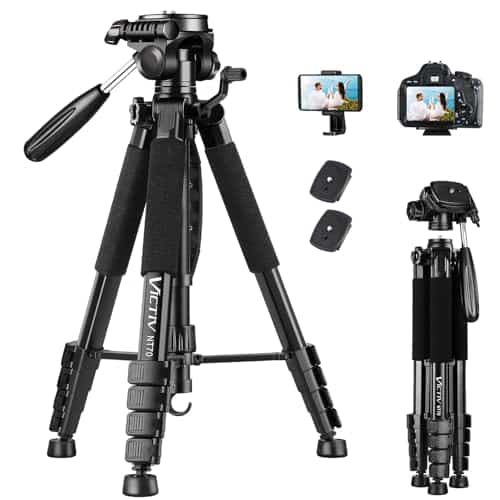
Using Tripods And Monopods
Tripods keep your camera steady for sharp images. They help when using heavy lenses.
Monopods are easier to move and good for quick shots. They offer some stability but are lighter.
- Use tripods for long sessions and heavy lenses
- Choose monopods for mobility and moderate support
- Look for sturdy but lightweight materials
- Adjust height for comfortable shooting angles
Accessories For Better Shots
Extra gear can improve your bird photos. Accessories help with lighting and comfort.
Using remote shutters and lens hoods reduces blur and glare. A good camera bag keeps your gear safe.
- Remote shutter release to avoid camera shake
- Lens hoods to reduce glare and protect lenses
- Extra batteries and memory cards for long shoots
- Camera rain covers for bad weather
- Comfortable camera straps for easy carrying
Settings For Sharp Images
Bird photography at feeders needs clear and sharp images. Good camera settings help capture detailed photos.
Using the right shutter speed, aperture, ISO, and focus mode improves image quality. Let’s explore these settings.
Optimal Shutter Speed And Aperture
Fast shutter speeds freeze bird movement. Choose speeds of 1/1000 second or faster for sharp shots.
Aperture controls the depth of field. Use f/5.6 to f/8 to keep birds sharp and background softly blurred.
- Shutter speed: 1/1000s or faster
- Aperture: f/5.6 to f/8 for good focus range
- Use a tripod for stability if needed
Iso Settings For Various Light
ISO adjusts your camera’s sensitivity to light. Low ISO gives cleaner images in bright light.
Increase ISO in low light, but not too high to avoid noise. Balance ISO with shutter speed and aperture.
- Bright daylight: ISO 100–400
- Cloudy or shade: ISO 400–800
- Early morning or evening: ISO 800–1600
- Use camera noise reduction if needed
Focus Modes For Birds In Motion
Birds move quickly at feeders. Use continuous autofocus to track their movement.
Single autofocus works for still birds. Switch to continuous mode for flying or quick movements.
- Single AF for perched or still birds
- Continuous AF for flying or moving birds
- Use back-button focus for better control
Lighting Tips
Good lighting is key to great bird photos at feeders. It helps show details and colors clearly.
Understanding how to use light can make your shots look natural and sharp. Let's explore some tips.
Shooting In Natural Light
Natural light gives soft and even colors in bird photos. Early morning and late afternoon offer the best light.
Avoid shooting in the midday sun. It can cause bright spots and lose detail in feathers.
Using Reflectors And Diffusers
Reflectors bounce light onto birds to brighten shadows. They add light without using flash.
Diffusers soften harsh sunlight. They reduce strong shadows and make light more even.
- Use a white reflector to add soft light
- Silver reflectors create brighter highlights
- Diffusers can be made from translucent fabric
- Position reflectors or diffusers close to the bird
Handling Harsh Shadows
Harsh shadows hide bird details and create uneven images. Find ways to reduce these shadows for better photos.
Change your shooting angle or wait for clouds to soften the light. Use reflectors to fill in dark areas.
- Avoid shooting with the sun behind you
- Use shade or diffuse light sources
- Fill shadows with reflectors or nearby light
- Adjust camera settings to balance light and dark
Composition Techniques
Good composition helps your bird photos look clear and interesting. It guides the viewer's eye to the main subject.
At feeders, you can use simple tricks to make your photos stand out. These tricks focus on how you arrange elements in the frame.
Framing Birds At Feeders
Use natural shapes like branches or leaves to frame the bird. This adds depth and draws attention to the bird.
Leave some space in front of the bird’s beak. This space shows where the bird is looking or moving.
- Use branches to create a natural frame
- Keep the bird off-center for a balanced image
- Leave space in the direction the bird faces
Background And Foreground Choices
Choose a simple background that does not distract from the bird. Soft green or blue colors work well.
Foreground elements can add interest but avoid clutter. Use blurred leaves or flowers to create a natural look.
- Pick plain or softly colored backgrounds
- Use shallow depth of field to blur the background
- Add soft foreground elements for depth
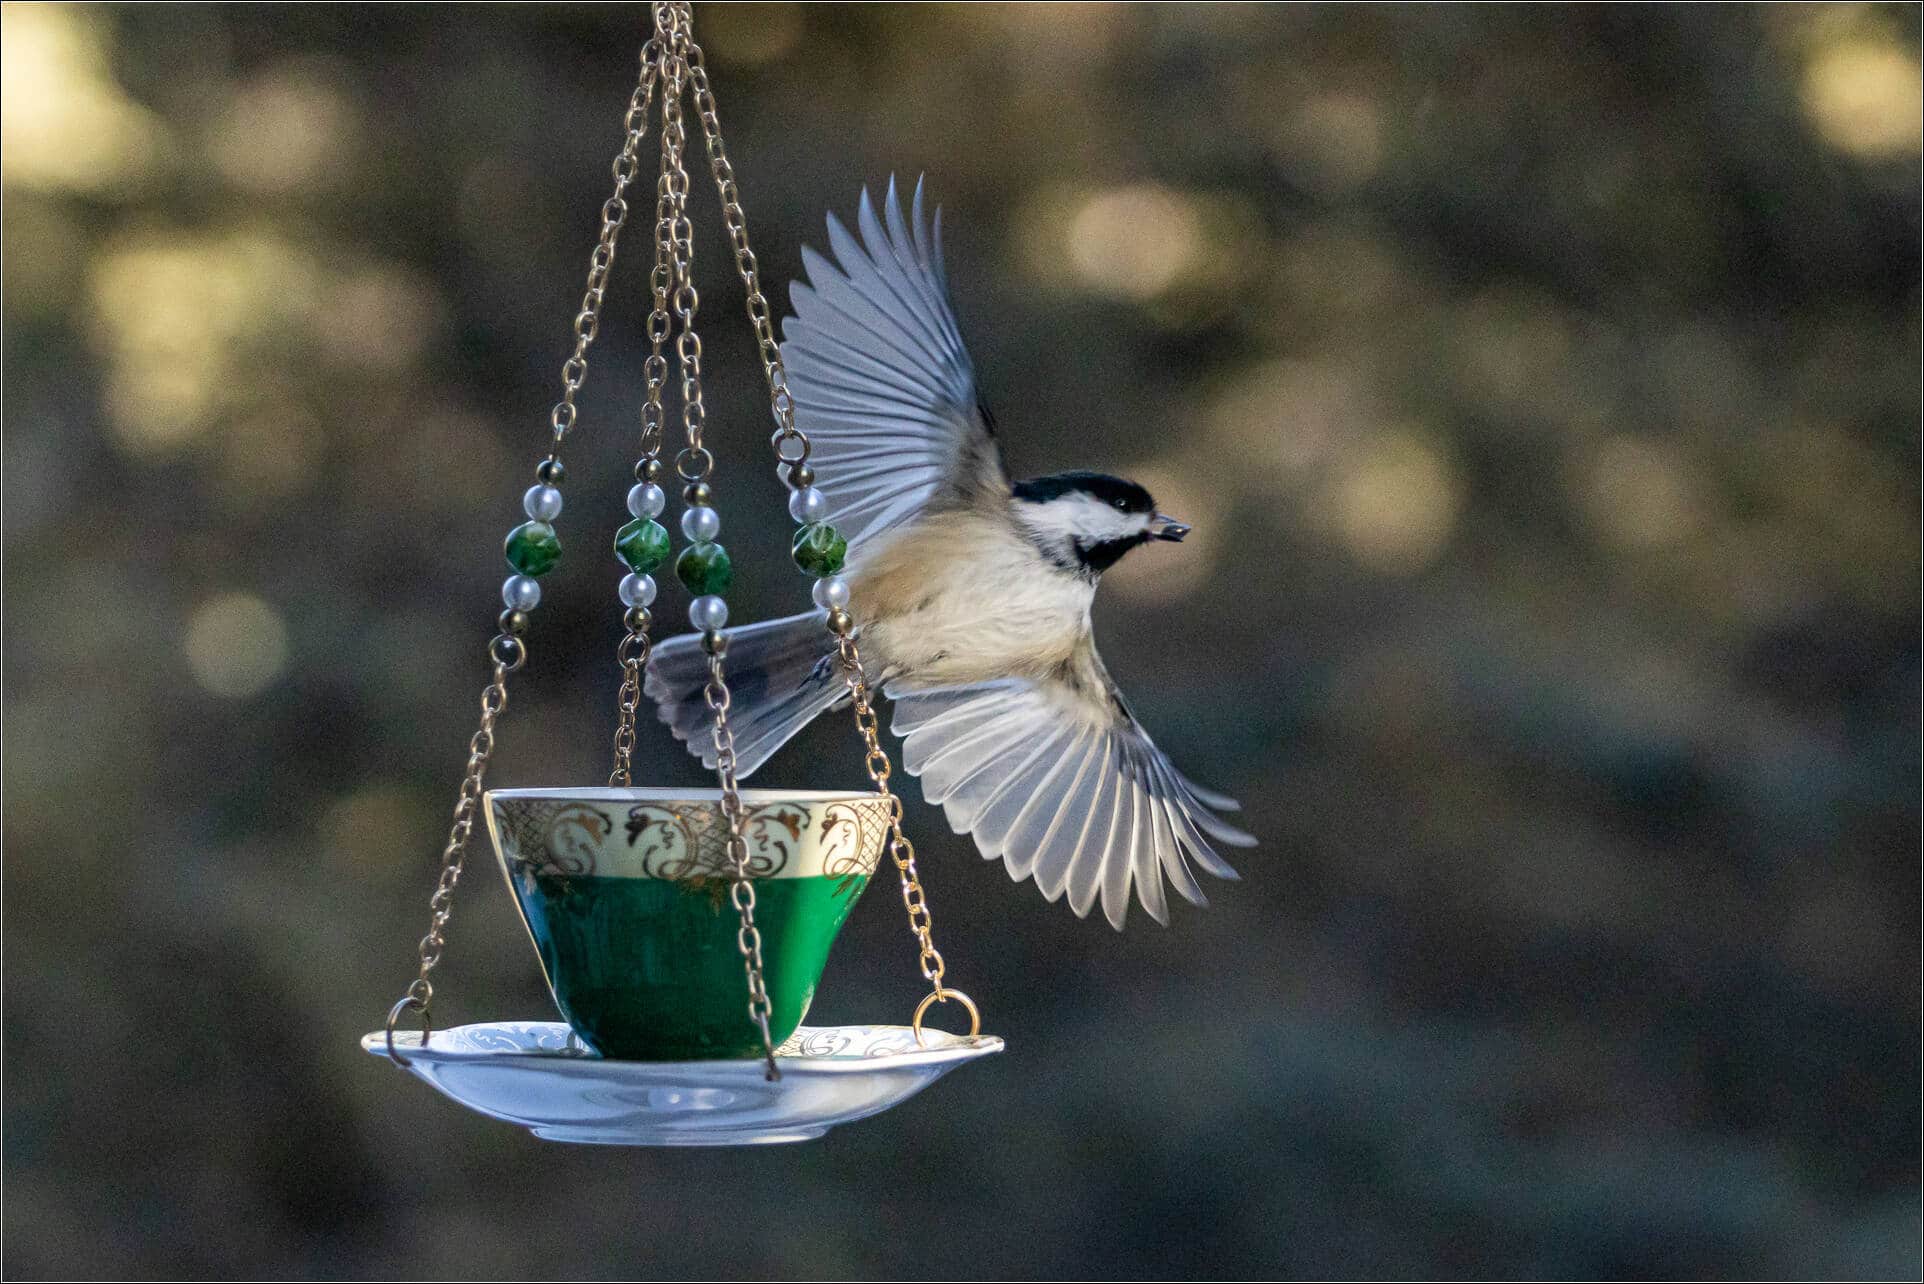
Capturing Action And Behavior
Watch for moments like birds eating, flying, or calling. These actions make your photos more lively.
Use a fast shutter speed to freeze motion. This keeps the bird sharp even when it moves quickly.
- Focus on interesting bird behaviors
- Use fast shutter speeds to capture sharp images
- Be patient and ready to shoot quickly

Credit: www.birdwatchingdaily.com
Patience And Timing
Bird photography at feeders needs patience and good timing. Birds can be shy and quick.
Waiting quietly helps you capture natural moments. Knowing when birds are active increases chances.
Best Times For Bird Activity
Birds visit feeders mostly in early morning and late afternoon. These times are cooler and safer.
Check local weather for calm days. Birds avoid feeders during strong winds or heavy rain.
- Early morning: 6 AM to 9 AM
- Late afternoon: 4 PM to 6 PM
- Avoid midday heat and bad weather
Waiting Strategies
Stay still and quiet near feeders. Move slowly if you need to adjust your position.
Use a blind or hide to avoid scaring birds. Bring a comfortable chair for long waits.
- Wear neutral colors to blend in
- Keep camera ready for quick shots
- Limit noise and sudden moves
Reading Bird Behavior
Watch birds’ body language to predict actions. Head turns and alert posture mean they sense danger.
Notice when birds feed or rest. Feeding times offer good photo chances, while resting shows calm poses.
- Look for signs of comfort or stress
- Follow bird movements at feeders
- Recognize calls as warnings or invitations
Post-processing Tips
Post-processing is important to enhance bird photos taken at feeders. It helps bring out the best colors and details.
Careful editing can make your bird images look sharper and more vibrant. It also removes distractions that take attention away.
Editing For Color And Detail
Adjust the color balance to make the bird’s feathers look natural. Boost the contrast slightly to highlight details.
Use sharpening tools carefully to bring out textures without making the photo look fake. Avoid over-editing to keep the image realistic.
Cropping For Impact
Crop your photo to focus on the bird and remove empty space. A tight crop can make the bird the clear subject.
Use the rule of thirds to place the bird off-center. This makes the photo more interesting to look at.
- Cut out distracting background areas
- Keep enough space so the bird looks natural
- Focus on the bird’s eye or head
Removing Distractions
Remove distracting elements like branches, wires, or spots that draw attention away from the bird. Use cloning or healing tools.
Clean backgrounds help the bird stand out. Keep the edits subtle to avoid unnatural results.
Credit: naturecanada.ca
Ethical Bird Photography
Bird photography at feeders offers a close look at beautiful birds. It is important to take photos in ways that protect birds and their homes.
Ethical bird photography means respecting birds and avoiding harm. Photographers should follow simple rules to keep birds safe and happy.
Respecting Wildlife
Always remember that birds are wild animals. Do not touch or chase them for a better photo. Stay calm and quiet to avoid scaring them.
Keep a safe distance from nests and young birds. Use zoom lenses to get close-up shots without getting near.
Avoiding Disturbance
Do not make loud noises or sudden moves near feeders. Birds can stop visiting if they feel unsafe. Be patient and wait quietly for good photos.
Limit the time spent at feeders to reduce stress on birds. Avoid blocking their flight paths or sitting too close for long periods.
- Use silent camera settings
- Wear natural colors to blend in
- Stay still while taking photos
Safe Feeding Practices
Use clean feeders to keep birds healthy. Change seed often and remove spoiled food. Dirty feeders spread disease among birds.
Offer food that is good for birds, like sunflower seeds and suet. Avoid feeding bread or junk food. Place feeders in safe spots away from pets.
- Clean feeders regularly with hot water
- Use fresh, bird-safe food
- Keep feeders away from windows to prevent collisions
Frequently Asked Questions
What Is The Best Time For Bird Photography At Feeders?
Early morning and late afternoon offer the best natural light. Birds are most active during these times, enhancing photo opportunities. Soft light reduces harsh shadows, making images more appealing and detailed. Planning shoots around these periods boosts your chances of capturing vivid bird photos.
How To Attract More Birds To Your Feeder?
Use a variety of seeds like sunflower, nyjer, and millet. Place feeders in quiet, sheltered areas near trees or shrubs. Keep feeders clean to prevent disease and encourage repeat visits. Offering fresh water nearby also attracts more bird species for photography.
What Camera Settings Work Best For Feeder Bird Photography?
Use a fast shutter speed (1/1000 or faster) to freeze motion. Set aperture between f/5. 6 and f/8 for sharp focus and good depth. Increase ISO cautiously to maintain image clarity in low light. Shoot in burst mode to capture multiple frames quickly.
How To Avoid Scaring Birds While Photographing Feeders?
Stay still and use a telephoto lens to keep distance. Wear neutral colors to blend with surroundings. Avoid sudden movements and loud noises near feeders. Using a hide or blind helps birds feel safe, improving natural behavior and photo quality.
Conclusion
Bird photography at feeders offers a great chance to see birds up close. Patience and practice help capture their natural beauty. Use simple tools and observe their behavior carefully. Enjoy the quiet moments and the colors they bring. Every shot tells a small story of nature.
Keep trying, and your photos will improve with time. Feeders invite birds and bring joy to your lens. This hobby connects you with nature in your own space.