How to Make Bird Seed Cylinders 2026 Guide DIY Tips
Are you looking for a fun and simple way to attract more birds to your yard? Making bird seed cylinders is an easy craft that can bring colorful feathered friends right to your window.
Not only will you enjoy watching the birds, but you’ll also feel great knowing you provided a healthy snack for them. In this guide, you’ll discover step-by-step how to create these tasty treats with just a few ingredients and simple tools.
Ready to become the go-to spot for local birds? Let’s get started!
Materials Needed
Making bird seed cylinders is a fun way to feed wild birds. You need some simple materials to create these tasty treats. This guide covers all the basics you will need.
Gather your ingredients and tools before starting. This helps you work quickly and easily without missing anything important.
Types Of Bird Seeds
Choosing the right seeds is key to attracting different kinds of birds. Use a mix to please many species.
- Black oil sunflower seeds – popular for many birds
- Millet – favorite for smaller birds like sparrows
- Nyjer (thistle) – attracts finches
- Cracked corn – good for larger birds
- Peanuts – high in protein and liked by woodpeckers
Binding Ingredients
Binding ingredients hold the seeds together in a solid shape. Use natural, bird-safe binders that dry firm but stay tasty.
| Ingredient | Description |
| Gelatin | Helps seeds stick when melted |
| Peanut butter | Binds seeds and adds flavor |
| Lard or suet | Solid fat that holds seeds together |
| Honey | Natural sticky sweetener |
| Corn syrup | Sticky syrup for binding |
Additional Tools
You will need a few tools to shape and dry your bird seed cylinders. These make the process easier and neater.
- Mixing bowl for combining seeds and binder
- Measuring cups and spoons
- Plastic molds or tubes to shape cylinders
- Wax paper for drying
- Spoons or spatulas for stirring
- String or twine to hang finished cylinders
Choosing The Right Seeds
Picking the right seeds is key to making bird seed cylinders. Birds prefer different seeds depending on their species and taste. Good seeds attract more birds to your feeder.
It is important to know which seeds are popular with birds and which seeds to avoid. This helps keep the birds healthy and happy.
Popular Seeds For Birds
Many birds enjoy certain types of seeds more than others. These seeds provide good nutrition and energy. Use these seeds in your bird seed cylinders:
- Black oil sunflower seeds – loved by finches and cardinals
- Millet – favorite of sparrows and juncos
- Nyjer (thistle) – attracts small songbirds like goldfinches
- Cracked corn – good for larger birds like pigeons and doves
- Safflower seeds – eaten by cardinals and grosbeaks
Seeds To Avoid
Some seeds can cause problems for birds or are not eaten at all. Avoid these seeds in your cylinders to keep birds safe and reduce waste.
| Seed Type | Reason to Avoid |
| Red millet | Often ignored by birds |
| Wheat | Hard for small birds to eat |
| Oats | May mold quickly if wet |
| Flaxseed | Can cause digestive issues |
Preparing The Mixture
Making bird seed cylinders needs a good mixture. This mix holds seeds together and shapes the cylinder.
Focus on choosing the right seeds and binder. Then adjust the mix to the right thickness.
Mixing Seeds And Binder
Pick seeds that birds like. Sunflower seeds, millet, and cracked corn work well. Mix them in a large bowl.
- Measure two cups of mixed bird seeds.
- Add one cup of dry binder like peanut butter or suet.
- Stir until seeds are coated evenly.
- Use a spoon or your hands to combine well.
Adjusting Consistency
The mixture should be sticky but not too wet. Add binder slowly to avoid a runny mix.
| Consistency | What to Do |
| Too Dry | Add more binder in small amounts |
| Too Wet | Mix in extra seeds to absorb moisture |
| Just Right | Mixture sticks together well and holds shape |
Shaping The Cylinders
Shaping bird seed cylinders is an important step in making bird feeders. The right shape helps the seeds stick together and makes it easier for birds to feed.
You can shape the cylinders using molds or by hand rolling. Both ways create sturdy shapes for hanging outside.
Using Molds
Molds give you a clean and even shape every time. You can use small tubes or specially made cylinder molds.
Fill the mold with the bird seed mixture and press it firmly. Pressing helps the seeds stick together well.
- Choose a mold size that suits your feeder
- Pack the mixture tightly for strong cylinders
- Remove the cylinder carefully to keep its shape
- Let the cylinders dry before hanging
Hand Rolling Techniques
Hand rolling is a simple way to shape cylinders without special tools. Use your hands to roll the mixture into a cylinder shape.
Keep your hands wet or slightly oily to stop the mixture from sticking to them. Roll gently but firmly to create a solid shape.
- Take a small amount of mixture in your hands
- Roll between your palms to form a cylinder
- Press lightly to make the cylinder firm
- Place on a tray to dry before use
Drying And Setting
After making bird seed cylinders, drying is important to keep their shape. Proper drying helps the cylinders last longer outside.
Choose a drying method that fits your time and tools. Air drying and oven drying are common ways to set the cylinders.
Air Drying Tips
Air drying is a simple way to harden bird seed cylinders without heat. Place the cylinders in a dry, cool place with good airflow.
Turn the cylinders every day to dry evenly. This prevents soft spots and helps them keep their shape.
- Use a wire rack or tray to let air circulate
- Avoid direct sunlight to stop seeds from burning
- Dry for 2 to 3 days until firm
- Keep away from humidity and moisture
Oven Drying Method
Oven drying speeds up the setting process. Use a low temperature to avoid burning the seeds or melting the binder.
Place the cylinders on a baking sheet lined with parchment paper. Heat them at 200°F (90°C) for 30 to 45 minutes.
- Preheat oven to 200°F (90°C)
- Arrange cylinders with space between each
- Check every 10 minutes to avoid burning
- Remove when firm but not browned
- Let cool completely before use

Credit: www.firefliesandmudpies.com
Storing Your Seed Cylinders
After making bird seed cylinders, proper storage keeps them fresh longer. Good storage helps prevent spoilage and pests.
Storing seed cylinders the right way ensures they stay tasty and safe for birds over time.
Best Storage Practices
Keep seed cylinders in a cool, dry place to avoid mold and insects. Use airtight containers for the best results.
- Store in sealed plastic or glass containers
- Keep away from direct sunlight and heat sources
- Place containers in a dry area with good air circulation
- Check seed cylinders regularly for signs of spoilage
Shelf Life Expectations
Seed cylinders can last several weeks if stored correctly. Moisture and pests reduce shelf life.
| Storage Condition | Approximate Shelf Life |
| Cool, dry, airtight container | 4 to 6 weeks |
| Room temperature, sealed container | 2 to 3 weeks |
| Exposed to air or moisture | Less than 1 week |
Attracting Birds With Seed Cylinders
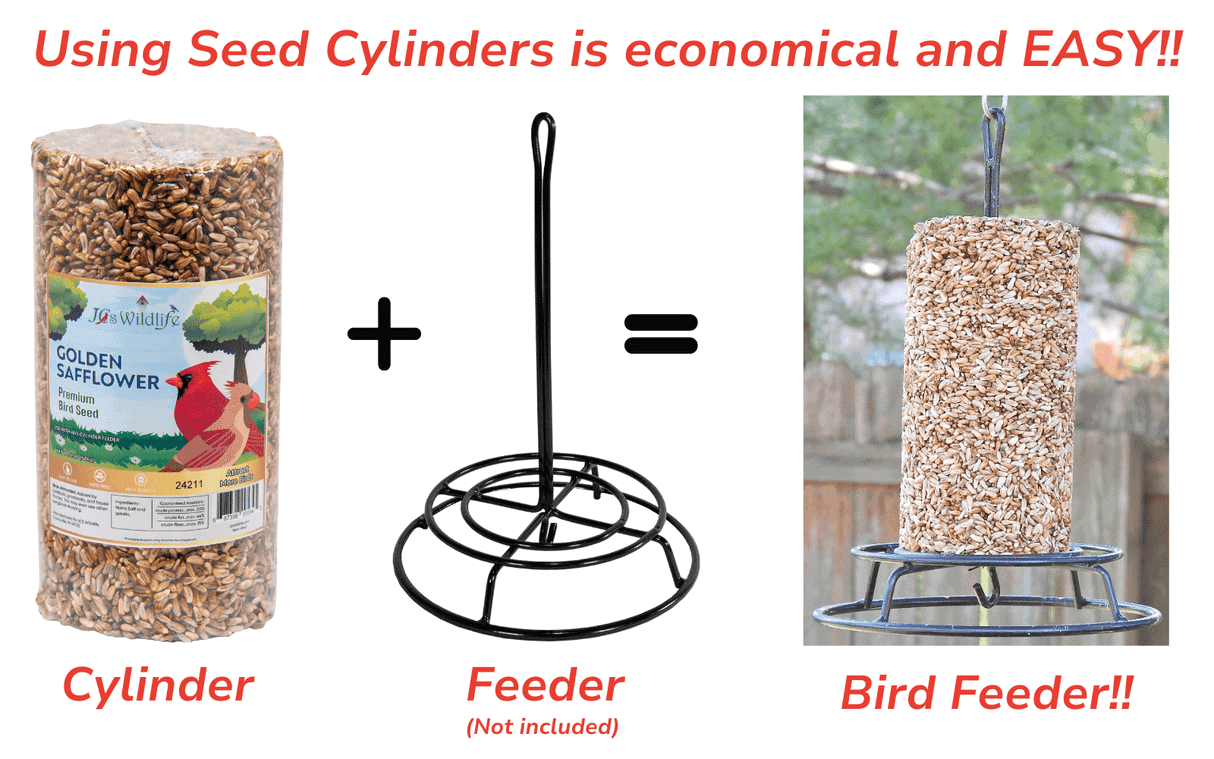
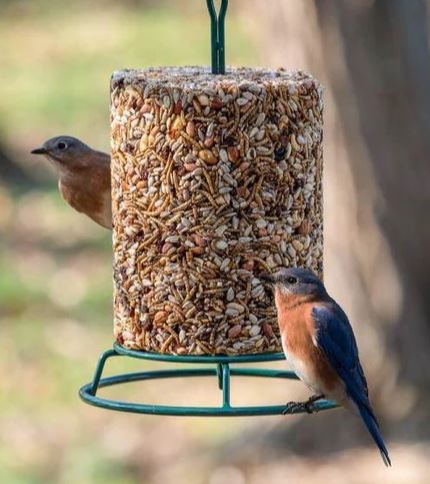
Bird seed cylinders are a great way to feed birds in your yard. They hold seeds in a compact shape birds enjoy pecking at. Making your own seed cylinders is simple and lets you choose the best seeds for local birds.
These cylinders attract many bird species by offering easy access to food. They also keep seeds fresh and reduce waste. You can hang or place them in spots where birds often visit.
Placement Ideas
Place seed cylinders where birds feel safe from predators. Hang them on tree branches or bird feeder hooks. Avoid windy areas to keep cylinders stable.
Try different heights to attract various bird types. Some birds like feeding close to the ground. Others prefer higher spots. Watch which places get the most visitors and adjust as needed.
- Hang cylinders near bushes or shrubs for cover
- Use a pole or stand to keep cylinders off the ground
- Place near windows for easy bird watching
- Avoid placing near busy walkways or noisy areas
Seasonal Considerations
Different seasons affect bird feeding habits. In winter, birds need more energy, so use high-fat seeds like sunflower or peanuts. In spring, use smaller seeds for nesting birds.
Keep seed cylinders dry in rainy seasons by hanging them under cover. Clean old seed residue to prevent mold and keep birds healthy.
- Winter: use energy-rich seeds and check cylinders often
- Spring: add smaller seeds for young birds
- Summer: watch for mold and clean feeders regularly
- Fall: prepare cylinders with seeds to help birds store fat
Credit: nature-niche.com
Troubleshooting Common Issues
Making bird seed cylinders is easy, but sometimes problems appear. These issues can stop your cylinders from holding together well or staying fresh.
This guide helps you fix common problems like seeds falling apart and mold growth. Follow these tips for better results.
Seeds Falling Apart
Seeds falling apart means the cylinder is weak and breaks easily. This happens if the mix is too dry or not sticky enough.
- Use enough binder like peanut butter or suet to hold seeds together.
- Mix ingredients well to coat seeds evenly.
- Press the mixture firmly into molds or tubes.
- Let cylinders dry completely before removing from molds.
- Avoid adding too many dry seeds without binder.
Mold Prevention
Mold can grow if cylinders stay wet or are stored in damp places. This makes the food unsafe for birds.
| Cause | How to Prevent |
| Too much moisture in mixture | Use dry ingredients and less liquid binder |
| Storing in humid or wet places | Keep cylinders in a dry, cool area |
| Not drying cylinders fully | Allow enough drying time before use or storage |
Credit: nature-niche.com
Frequently Asked Questions
What Ingredients Are Needed For Bird Seed Cylinders?
You need bird seed, gelatin or peanut butter, water, and a mold. These ingredients bind seeds into a solid shape. They attract various birds and provide essential nutrition during cold months.
How Long Do Bird Seed Cylinders Last Outdoors?
Bird seed cylinders typically last 1-2 weeks outside. Weather conditions like rain or heat affect their durability. To extend life, hang them in shaded, dry areas away from predators.
Can I Use Homemade Molds For Bird Seed Cylinders?
Yes, homemade molds like paper towel rolls or silicone cups work well. Ensure molds are clean and food-safe. They help shape the seed mixture and make removal easy.
Are Bird Seed Cylinders Safe For All Bird Species?
Bird seed cylinders are safe for most common backyard birds. Avoid using toxic ingredients or moldy seeds. Always use fresh, high-quality seeds suitable for local bird species.
Conclusion
Crafting bird seed cylinders is simple and rewarding. Birds will enjoy your homemade treat. Plus, it’s a fun activity for all ages. You only need a few supplies and ingredients. Mix, mold, and let them dry. Soon, your garden will be a bird paradise.
Sharing your creations can inspire others too. Take pride in your effort and watch the birds enjoy. Remember, every seed you mold helps support local wildlife. Enjoy the beauty of nature in your backyard. Happy bird-watching!