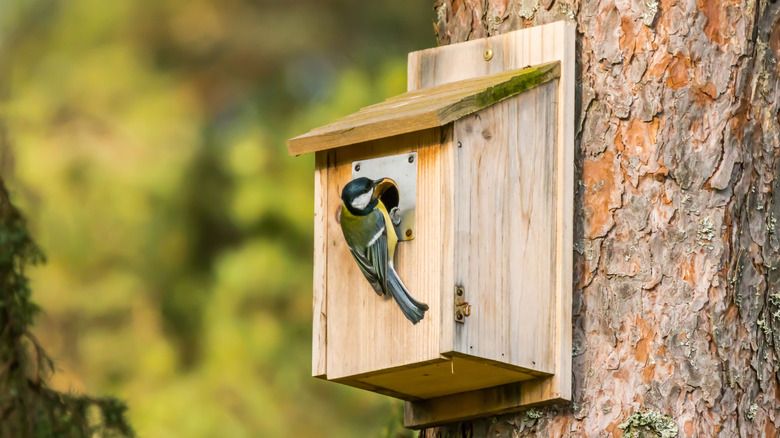
Have you ever wanted to welcome more birds into your backyard? Building a bird roosting box is a simple way to create a safe, cozy home for them.
Not only does it help birds stay warm during chilly nights, but it also brings nature closer to you. Imagine waking up to the cheerful songs of birds nesting just outside your window. In this guide, you’ll learn How to Make a Bird Roosting Box with easy steps, even if you’ve never built anything before.
Keep reading, and discover how a small project can bring big joy to your outdoor space.

Credit: www.youtube.com
Choosing The Right Materials
Building a bird roosting box starts with picking the right materials. Good choices help birds stay safe and dry.
Using strong and natural materials makes the box last longer outside. This guide covers wood types, tools, and supplies.
Wood Types For Durability
Choose wood that can handle rain, wind, and sun. Avoid soft or treated wood that might harm birds.
- Cedar: Naturally resists rot and insects.
- Redwood: Strong and lasts long outdoors.
- Pine: Affordable but needs sealing to protect.
- Fir: Durable with tight grain but should be untreated.
- Reclaimed wood: Eco-friendly if free of chemicals.
Essential Tools Needed
Use the right tools to cut and join wood safely and neatly. This helps make a good home for birds.
| Tool | Purpose |
| Hand saw | Cut wood pieces to size |
| Hammer | Drive nails into wood |
| Drill | Make holes for ventilation and screws |
| Screwdriver | Fasten screws securely |
| Measuring tape | Measure wood accurately |
| Sandpaper | Smooth rough edges |
Additional Supplies
Besides wood and tools, these supplies help build a safe, weatherproof box.
- Galvanized nails or screws to resist rust
- Non-toxic wood glue for extra strength
- Exterior-grade water-based sealant to protect wood
- Hinges for easy cleaning access
- Wire mesh for predator protection
Credit: www.outdoorguide.com
Designing The Roosting Box
Designing a bird roosting box needs careful planning. Birds need a safe and comfortable place to rest.
The design should protect birds from weather and predators. This guide covers key points to consider.
Size And Dimensions
Choose the right size to fit the bird species you want to attract. The box must be roomy but cozy.
- Height: 10 to 15 inches
- Width: 6 to 10 inches
- Depth: 6 to 10 inches
- Floor area should allow the bird to move freely
Entrance Hole Specifications
The entrance hole size controls which birds can enter. It also helps keep predators out.
| Bird Type | Hole Diameter |
| Small songbirds | 1 to 1.25 inches |
| Bluebirds | 1.5 inches |
| Chickadees | 1 1/8 inches |
| Nuthatches | 1.25 inches |
- Bird Housing Experts emphasize thermodynamics: “The most critical difference between a summer nest box and a winter roost box is the entrance hole placement. In a roost box, the entrance hole must be near the bottom of the box, not the top. Since hot air rises, a low entrance traps the collective body heat of the birds inside the ‘attic’ of the box. If you put the hole at the top (like a standard birdhouse), all that vital warmth escapes, defeating the purpose of the shelter.”
Ventilation And Drainage
Good airflow stops the box from getting too hot or damp. Drainage removes water to keep birds dry.
Include these features in your design:
- Small holes near the top for air circulation
- Drain holes in the floor to let water escape
- Overhang roof to protect from rain
Step-by-step Construction
Building a bird roosting box is a simple project anyone can do. It offers birds a safe place to rest and shelter. Follow these clear steps to make your own bird box.
This guide covers cutting wood, assembling parts, adding the roof, and finishing details. Each step is explained in an easy way.
- Biologists warn about sanitation: “A good roosting box must have internal perches (dowels) to accommodate multiple birds huddled together. However, these perches must be staggered and not placed directly above one another. If perches are aligned vertically, birds on the top level will defecate on the birds below, matting their feathers and destroying their insulation, which can be fatal in freezing temperatures.”
Cutting The Wood Pieces
Start by cutting all wood pieces to the right size. Use untreated wood to keep birds safe. You will need pieces for the front, back, sides, bottom, and roof.
- Cut one piece 8 inches by 10 inches for the back.
- Cut the front piece 8 inches by 10 inches, with a 1.5-inch hole near the top for entrance.
- Cut two side pieces 8 inches by 8 inches, with one side slanting for the roof.
- Cut one bottom piece 6 inches by 6 inches for the floor.
- Cut two roof pieces: one 8 inches by 6 inches and one 8 inches by 7 inches for overhang.
Assembling The Box
Put the pieces together carefully. Use screws or nails to connect each part. Make sure the box is sturdy and safe for birds.
- Attach the sides to the back piece with screws.
- Fix the bottom piece to the sides and back.
- Attach the front piece with the entrance hole to the sides and bottom.
- Check all joints to make sure they are tight and secure.
Adding The Roof
The roof protects the box from rain and sun. It should have an overhang to keep water away from the entrance.
| Roof Piece | Size (inches) | Purpose |
| Main Roof | 8 x 6 | Cover the top of the box |
| Overhang Roof | 8 x 7 | Extend beyond the main roof for extra protection |
Attach the main roof piece to the top of the box. Then fix the overhang piece on top, making sure it extends past the entrance hole.
Finishing Touches
Sand all rough edges to prevent injury to birds. Avoid painting inside the box. You can paint the outside with non-toxic paint if you want.
Before placing the box outside, drill a few small holes in the bottom for drainage. Mount the box at least 5 feet above the ground, facing away from strong winds.
- Conservationists advise on grip: “The interior walls of a roosting box, particularly the wall below the exit hole, must be scored or roughened (using a saw or heavy sandpaper). In a crowded box, birds cannot fly out; they must climb. Smooth, planed lumber can become a ‘death trap’ if the birds cannot get a grip to climb up to the exit, especially if they are weakened by cold.”
Placement And Installation
Building a bird roosting box is only part of the process. Proper placement and installation help birds feel safe and use the box. Choosing the right spot and mounting it well are key steps.
Think about the seasons and the environment around the box. This will keep the birds comfortable all year long.
Choosing The Location
Select a quiet place away from busy areas. Birds like spots that offer shelter from wind and predators. Avoid areas with direct sunlight all day to prevent overheating.
- Place the box 5 to 10 feet above the ground
- Face the entrance away from prevailing winds
- Keep the box near trees or shrubs for cover
- Do not place it near bird feeders to reduce competition
- Ensure the area is free from heavy foot traffic
Mounting Techniques
Use strong, weather-resistant materials to mount the box. Secure it to a tree or pole so it does not sway or fall. Avoid nails that can harm the tree.
| Mounting Method | Details |
| Straps or Bands | Wrap around tree trunk, adjustable and gentle |
| Screws with Backing Board | Use screws through a wooden board to protect tree |
| Brackets | Metal brackets fixed to poles or walls |
| Chains | Hang from sturdy branches with chains |
Seasonal Considerations
Adjust the box position based on the season. In hot months, give the box shade. In cold months, avoid damp areas to keep birds dry and warm.
- Spring: Clean old nesting material before birds arrive
- Summer: Check for overheating and provide shade if needed
- Fall: Remove debris and inspect for damage
- Winter: Keep box dry, add insulation if necessary
Maintenance And Monitoring
Keeping your bird roosting box in good shape helps birds stay safe and comfortable. Regular checks and cleaning keep the box healthy for birds.
Watching how birds use the box helps you learn what they need. It also shows if the box needs fixing or changing.
Cleaning The Box
Clean the box once a year, usually in late fall. Remove old nests and debris to stop pests and disease.
Wear gloves and use a brush or scraper to clean inside the box. Let it dry before closing it again.
- Remove old nesting materials
- Scrub walls and floor gently
- Use mild soap if needed
- Rinse well and air dry
Checking For Wear
Check the box for cracks, loose parts, or rotten wood. Birds need a strong and safe home.
Fix small problems quickly. Replace broken parts and tighten screws. A good box lasts many years.
- Look for cracks or holes
- Test if the roof is secure
- Check hinges and screws
- Replace damaged wood
Encouraging Bird Habitation
Place the box in a quiet, safe spot. Birds like locations away from noise and predators.
Keep watching the box to see if birds visit. Adding natural materials nearby can help them feel welcome.
- Mount the box 5-10 feet above ground
- Face entrance away from wind
- Keep area free from predators
- Leave natural plants nearby

Credit: www.charlestoncrafted.com
Frequently Asked Questions
What Materials Do I Need For A Bird Roosting Box?
To make a bird roosting box, you’ll need untreated wood, screws, nails, and a saw. Additionally, gather sandpaper for smoothing edges, and a drill for making entrance holes. Consider adding a hinge for easy cleaning access. Ensure all materials are weather-resistant to protect the birds from harsh conditions.
How Do I Choose The Right Location For A Bird Box?
Select a quiet, sheltered spot away from predators and strong winds. Ensure the box faces away from prevailing winds and direct sunlight. It’s ideal to place the box at least six feet above the ground. Avoid areas with too much human activity to encourage bird habitation.
What Is The Best Size For A Bird Roosting Box?
The best size depends on the bird species you aim to attract. Generally, a box with dimensions around 10x6x6 inches suits small birds. Ensure the entrance hole is appropriately sized for the targeted species. Research specific bird requirements for a more tailored design that enhances bird comfort.
How Do I Maintain A Bird Roosting Box?
Regularly clean your roosting box to prevent disease and parasite build-up. After the breeding season, remove old nests and debris. Inspect for damage and repair any cracks or loose parts. Ensure the box remains weatherproof and secure. Routine maintenance helps attract birds and provides a safe environment.
Conclusion
Building a bird roosting box helps birds find safe homes. It supports nature and brings birds closer to you. Use simple materials and follow easy steps for best results. Place the box in a quiet, safe spot outdoors. Watch birds enjoy their new shelter.
Small efforts can make a big difference for wildlife. Try making one today and see the joy it brings. Helping birds is a small act with great rewards.