Are you eager to see your bird eggs hatch into healthy chicks? Understanding bird incubation success is the key to turning your care into thriving life.
Whether you’re a seasoned breeder or just starting out, knowing the right steps can make all the difference. Imagine the joy of watching tiny beaks break through shells, knowing you played a vital role in their journey. Keep reading to discover practical tips and secrets that will boost your chances of success and bring new life to your feathered friends.
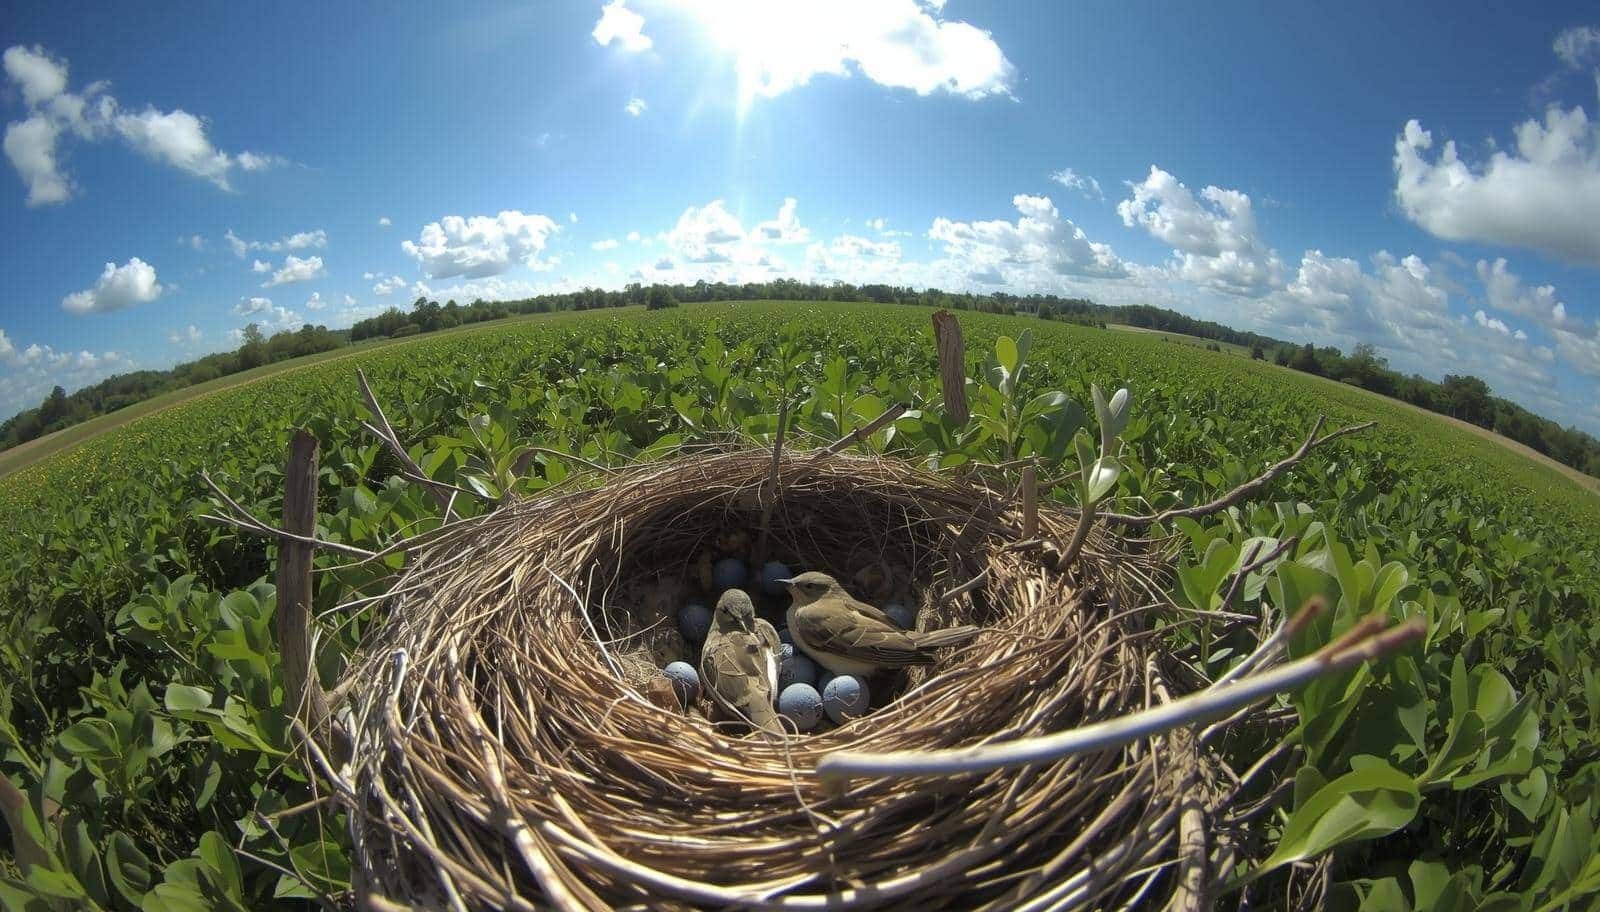
Credit: nestwatch.org
Factors Affecting Incubation
Successful bird incubation depends on many factors. These affect embryo growth and hatch rates.
Understanding key elements helps keep eggs healthy during incubation.
Temperature Control
Maintaining correct temperature is vital. Too hot or too cold can harm embryos.
Most bird eggs need a stable temperature between 99°F and 102°F (37.2°C to 38.9°C).
Humidity Levels
Humidity affects egg moisture loss. Too dry or too wet can stop development.
- Low humidity causes eggs to dry out and shrink.
- High humidity can lead to mold growth and poor air exchange.
- Ideal humidity is usually 40% to 50% during incubation.
- Increase humidity to 65% to 75% in the last days before hatching.
Egg Turning Frequency
Turning eggs prevents the embryo from sticking to the shell. It also helps even heat distribution.
| Turnings per Day | Effect on Embryo |
| 0-2 | High risk of embryo death |
| 3-5 | Improved development |
| 6-8 | Best results for healthy hatching |
| More than 8 | No added benefits, may cause stress |
Ventilation Needs
Fresh air supplies oxygen and removes carbon dioxide. Proper ventilation supports growth.
Too little airflow causes weak embryos. Too much airflow can dry eggs.
Choosing The Right Incubator
Bird incubation success depends a lot on the incubator you choose. Picking the right one helps keep eggs safe and healthy.
Different incubators offer various features. Knowing what to look for makes a big difference in hatching rates.
Types Of Incubators
There are several types of incubators. Each type suits different needs and budgets.
- Still Air Incubators: Use natural air without a fan. Temperature can be uneven.
- Forced Air Incubators: Have a fan to circulate air. Temperature stays more even.
- Automatic Turners: These turn eggs automatically to help embryo growth.
- Manual Turners: You turn the eggs by hand several times a day.
Size And Capacity
Incubators come in many sizes. Think about how many eggs you want to hatch at once.
Small incubators hold a few eggs. Large ones hold dozens or more. Choose one that fits your space and needs.
- Small: 10 to 20 eggs, good for beginners or small flocks.
- Medium: 20 to 50 eggs, for hobbyists with more birds.
- Large: 50+ eggs, used by farms or serious breeders.
Ease Of Use
Choose an incubator that is easy to operate. Simple controls help you keep the right temperature and humidity.
Some incubators have digital displays and alarms. These features make monitoring easier and reduce mistakes.
- Manual controls: Cheaper but need careful attention.
- Digital controls: Easier to set and keep steady conditions.
- Automatic egg turning: Saves time and effort.
Maintenance Tips
Keeping your incubator clean is important. Dirt and bacteria can harm the eggs.
Check parts regularly to make sure everything works well. Replace broken pieces quickly.
- Clean the incubator after each use with mild soap and water.
- Check and replace filters if your incubator has them.
- Make sure fans and heaters work properly before starting incubation.
- Store the incubator in a dry place when not in use.
Preparing Eggs For Incubation
Proper preparation of eggs is essential for good bird incubation results. It starts with selecting the right eggs and ends with proper storage.
Following clear steps can improve hatching success and keep embryos healthy during incubation.
Selecting Healthy Eggs
Choose eggs that look clean and have no cracks or deformities. Healthy eggs increase the chances of successful hatching.
- Pick eggs with smooth shells free of dents
- Avoid eggs with thin or fragile shells
- Choose eggs laid recently, ideally within 7 days
- Look for eggs of normal size and shape for the bird species
Cleaning Techniques
Cleaning eggs carefully removes dirt and bacteria. Use gentle methods to avoid damage.
| Cleaning Method | Description | When to Use |
| Dry Cleaning | Use a soft brush or cloth to wipe dirt | For lightly soiled eggs |
| Wet Cleaning | Use warm water and mild detergent quickly | For heavily soiled eggs |
| Disinfection | Use approved disinfectants carefully | Only if necessary and safe for eggs |
Biosecurity Specialists advise against immersion: “Never soak or fully immerse an egg in water, even warm water. An eggshell is porous, and as the egg cools, the interior pressure drops, causing any liquid on the shell surface to be sucked into the shell, a process known as imbibition. If that water contains bacteria (even if visually clean), it introduces the pathogen directly to the embryo. The safest cleaning method is always dry, gentle wiping or spot-cleaning with an approved sanitizer.”
Storage Before Incubation
Store eggs in a cool, stable place before incubation. Proper storage keeps embryos alive.
- Keep eggs at 55°F to 65°F (13°C to 18°C)
- Place eggs with the pointed end down
- Turn eggs gently once or twice daily
- Do not store eggs longer than 7 days
Monitoring During Incubation
Careful monitoring during bird egg incubation helps ensure the highest chance of success. Watching eggs closely allows timely actions to support embryo growth.
This guide covers key steps to track and maintain the right conditions for incubation.
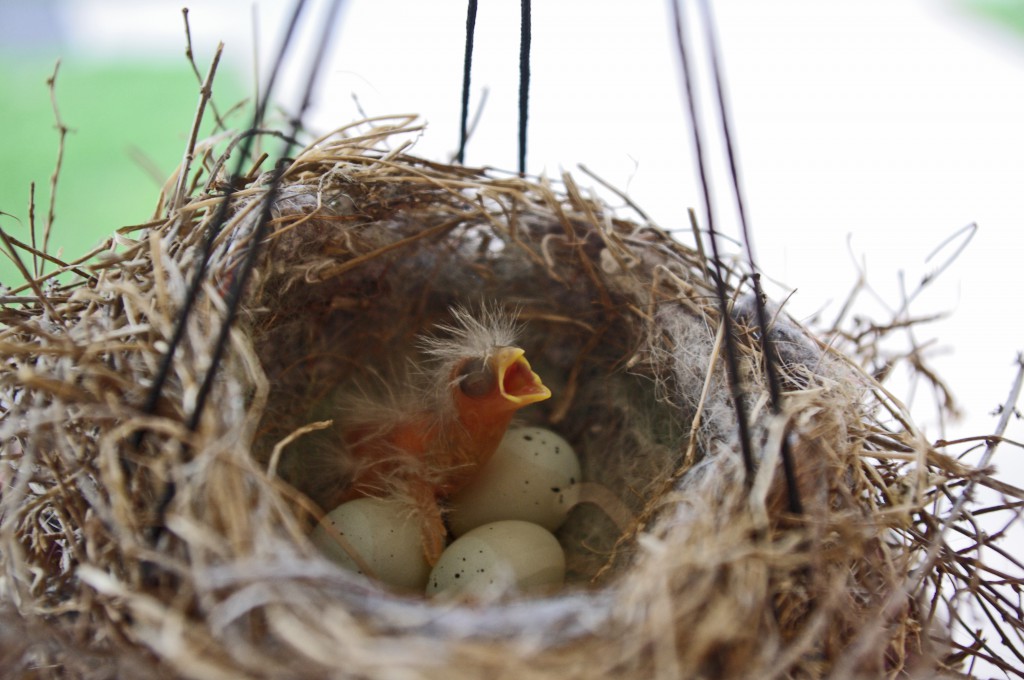
Candling Eggs
Candling lets you see inside eggs using a bright light. This shows embryo development and detects any problems early.
- Use a small flashlight in a dark room
- Hold the egg gently against the light
- Look for blood vessels and embryo movement
- Remove clear or cracked eggs to avoid contamination
Hatchery Managers use a standardized visual check: “Candling is best performed on days 4–7 to confirm fertility (look for the spider-like web of veins radiating from the dark spot). However, a reliable way to check developmental progress throughout incubation is by monitoring the size of the air cell. A healthy air cell should gradually increase in size as the egg loses moisture, accounting for about one-third of the egg volume by the final three days before hatching. An air cell that is too small indicates excessive humidity, while one that is too large indicates low humidity.”
Adjusting Conditions
Keep the incubator temperature and humidity stable. Small changes can harm the eggs.
| Condition | Ideal Range |
| Temperature | 99.5°F to 100.5°F (37.5°C to 38°C) |
| Humidity | 40% to 50% for most of incubation |
| Humidity | 65% to 75% during hatching |
Check these levels daily and adjust vents or water trays as needed. Turning eggs regularly prevents embryos from sticking to shells.
Identifying Problems Early
Early detection of issues helps save eggs and improve hatch rates. Signs of trouble include lack of growth or unusual smells.
- Infertile or dead embryos
- Excess moisture or mold inside the incubator
- Temperature or humidity outside safe ranges
- Eggshell cracks or damage
Hatching Process Tips
Bird incubation is a careful process that needs patience. Knowing how to help during hatching improves success.
Watching eggs closely helps you know when hatching starts. Proper care keeps the eggs safe and healthy.
Signs Of Imminent Hatching
Birds show clear signs before hatching. Eggs may start to crack or sound tapping noises.
The mother bird may act restless or leave the nest more often. These signs mean hatching is near.
- Small cracks or pipping on the egg shell
- Tapping or peeping sounds from inside the egg
- Mother bird moves more or changes posture
- Egg temperature might slightly drop as hatching nears
Helping Hatchlings Safely
Do not rush to open eggs. Let hatchlings break out naturally. This prevents injury.
If a hatchling is stuck, gently help by softening the shell with warm water. Use care to avoid harm.
- Keep the nest warm and dry
- Use clean hands or tools if helping
- Do not remove hatchlings too early
- Observe quietly to avoid stressing birds
Common Challenges
Incubation may face problems like eggs not hatching or weak chicks. These need quick attention.
Poor temperature, humidity, or eggshell damage cause most issues. Fixing these helps improve success.
- Low humidity can dry out eggs
- High temperature may kill embryos
- Eggs can crack from rough handling
- Infections may harm embryos or chicks
Post-hatchling Care
After birds hatch, they need careful care to grow strong and healthy. Their environment, food, and health must be watched closely.
Proper care helps young birds survive and thrive. This guide covers key points to help you care for hatchlings well.
Temperature And Environment
Hatchlings need a warm and safe place to grow. Keep the temperature steady between 95°F and 99°F in the first week. Lower it by 5°F each week.
- Use a heat lamp or brooder to keep warmth
- Keep the area clean and dry
- Provide soft bedding to protect fragile skin
- Keep noise low to reduce stress
Feeding And Hydration
Young birds need frequent feedings with proper nutrition. Use food made for their species and age. Fresh water must always be available.
| Age (Days) | Feedings per Day | Type of Food |
| 1-7 | 6-8 | Specialized Hatchling Formula |
| 8-14 | 4-6 | Moistened Seeds or Pellets |
| 15+ | 3-4 | Regular Bird Food |
Health Monitoring
Check hatchlings daily for signs of illness. Look for clear eyes, clean feathers, and normal activity. Seek help if birds seem weak or stop eating.
- Watch for breathing problems
- Look for droppings that are unusual in color or amount
- Keep nails and beak clean and trimmed
- Separate sick birds to avoid spreading disease
Troubleshooting Common Issues
Bird incubation can be tricky, with several problems affecting success. Identifying issues early helps improve hatch rates.
This guide covers common problems like infertile eggs, eggs failing to hatch, and deformed hatchlings.
Infertile Eggs
Infertile eggs do not develop embryos and will never hatch. Causes include poor mating or unhealthy breeding birds.
- Check if the male and female birds are healthy.
- Ensure proper mating behavior and timing.
- Keep eggs warm and turn them regularly.
- Use candling to detect fertility after a week.
Eggs Failing To Hatch
Sometimes eggs develop but fail to hatch. This can result from temperature or humidity problems during incubation.
| Cause | Effect | Solution |
| Low temperature | Slow embryo growth | Keep incubator at correct heat |
| High humidity | Weak shells, drowning chicks | Adjust humidity to proper level |
| Insufficient egg turning | Embryo sticks to shell | Turn eggs 3-5 times daily |
Deformed Hatchlings
Deformed hatchlings have physical problems that reduce survival. Causes include genetics and poor incubation care.
- Use healthy parent birds with no genetic defects.
- Maintain steady temperature and humidity.
- Handle eggs gently to avoid cracks.
- Provide clean, safe hatching environment.

Credit: www.numberanalytics.com

Credit: livingjoydaily.com
Frequently Asked Questions
What Factors Affect Bird Incubation Success Rates?
Temperature, humidity, and egg turning frequency greatly impact bird incubation success. Proper conditions mimic natural settings and prevent embryo death. Consistent care and hygiene also reduce risks of infection, enhancing hatch rates.
How Long Does Bird Incubation Typically Last?
Bird incubation duration varies by species, usually between 10 to 30 days. Smaller birds hatch faster, while larger species take longer. Monitoring species-specific incubation periods ensures proper care and timing for successful hatching.
Can Artificial Incubation Improve Bird Hatch Rates?
Yes, artificial incubation controls temperature, humidity, and turning precisely. It reduces risks of natural predators and environmental fluctuations. This method increases hatch rates when natural nesting conditions are unfavorable or unavailable.
What Signs Indicate Successful Bird Egg Incubation?
Candling eggs reveals embryo development, showing visible veins and movement. Consistent egg warmth and no foul odors also signal success. Healthy eggs remain intact and show gradual changes until hatching.
Conclusion
Achieving bird incubation success takes patience and attention. Each step counts. From choosing the right environment to ensuring proper temperature. Careful monitoring plays a crucial role. Small changes can impact outcomes significantly. Understanding bird needs helps in improving results. Observing the eggs and environment daily makes a difference.
Success in bird incubation offers rewarding experiences. It brings joy and satisfaction seeing chicks hatch. With practice, anyone can improve their incubation skills. Patience, observation, and dedication lead to success. Enjoy your journey in bird incubation.